All Categories
Featured
Table of Contents
- – Rv Slide Out Roof Repair Placentia, CA
- – OCRV Center
- – Rv Roof Repair Placentia, CA
- – Repair Rv Roof Leak Placentia, CA
- – Rv Rubber Roof Replacement Placentia, CA
- – Class C Rv Roof Repair Placentia, CA
- – Epdm Rv Roof Repair Placentia, CA
- – Rubber Roofing For Rv Placentia, CA
- – Rv Roof Repair Service Near Me Placentia, CA
- – Rv Roof Repair Service Near Me Placentia, CA
- – Rv Roof Repair Near Me Placentia, CA
- – Rv Rubber Roof Repair Placentia, CA
- – Epdm Rv Roof Repair Placentia, CA
- – Best Rv Roof Repair Placentia, CA
- – OCRV Center
Rv Slide Out Roof Repair Placentia, CA
He walks you step by action with the simple procedure for patching and strengthening TPO recreational vehicle roof lining with rubber tape strips, which you can grab from simply regarding any kind of credible supplier. Dicor makes a fantastic set that Dave always suggests. In this case, the recreational vehicle's television antenna has actually worn tiny openings into the TPO motor home roof covering, so to prevent bubbling under the membrane from rainfall and sun damage, Dave uses these rubber patches to cover the holes and maintain the roofline watertight.
This is specifically true when patching larger holes. That's it, 10 mins of your time and a sure-fire kit. Make use of Dave's specialist ideas to avoid that little cut on your TPO recreational vehicle roofing from transforming into a pricey frustration! When we mindful top right here, we cleaned this roofing and we discovered a number of areas, we see right here where this roof antenna boils down in.
Rv Roof Repair Placentia, CA
It's just a rubber, the old design is similar to this, and it obtains chalked white, it'll begin to deteriorate, but I obtain any kind of kind of moisture under here and it's gon na start to operate in. Currently, these two places happen ahead from the antenna, as this comes down below and it's using right into 'em.
And I'm gon na put this in there just to give it a little bit if support to make sure that I do not puncture that in future so. Got one right below, one right here, so I'm just gon na take and cut this concerning two sizes, right there. And this simply takes place to be a, a leakages, Dicor makes it, DiSeal they call it, very same kind of material, and it simply has a flap on here.
Membrane layer can be glued either side down. Single-Ply membranes are the same color throughout. Membrane should be installed onto tidy wood surface, do not set up on top of existing membrane, glue, and so on. Router all air vent and accessory openings. Sand all openings, seams, and edges to a smooth coating. Remove all debris off roofing system with airline.
"Bed Sheet" the membrane. That is, fold it in fifty percent so fifty percent of the roofing is subjected. 3. Apply glue in a damp film thickness of 8-10 mils with a short-napped paint roller to the subjected fifty percent of the roof decking, brush can be made use of but is a lot more hard. (1 gal.
Repair Rv Roof Leak Placentia, CA
Alternative technique, standard membrane in area making use of" staples 3"-5" apart after that use bar. If roof-edge moldings are not installed on roof during this time membrane layer will peel-up as drying out.

Both sides of the front and back roof covering molding need to be sealed with caulk/sealant. Utilizing an energy knife "x" reduced all roof openings.
There is no demand to spread the sealant as you are using it. * Butyl tape supplies the "Main Seal" against water infiltration or infiltration in these membrane roof covering settings up.
Rv Rubber Roof Replacement Placentia, CA
Diluent Water, if needed. Usage as received. Clean-up calls for only cozy water.
Eye get in touch with If item calls eye, flush with water for at the very least 15 mins and look for clinical interest right away. Skin call If item calls skin, laundry affected area with soap and water. Seek clinical attention if irritability establishes or lingers. Launder contaminated garments prior to reuse. Breathing Move based on fresh air in situation of unintentional breathing of vapors or decomposition items.
Mask both sides of joint with covering up tape. Cut nozzle to wanted grain dimension. Pierce seal. Load sealant cartridge in caulking weapon. Area nozzle right into joint and apply sealer into void. Use over 40 deg F (5 deg C)Smooth or "tool" grain if needed. Get rid of concealing tape quickly. Clean hands and tools extensively before cleaning with soap and water.
In instance of eye contact flush eyes with water for 15 mins and call a medical professional. In situation of skin contact, extensively wash skin with soap and water.
Class C Rv Roof Repair Placentia, CA
Some RV fixings can be momentarily postponed, but a motor home roofing repair work is NOT one of them. Stopping working to fix damages to your RV's roof covering can trigger an irritating and expensive collection of situations that will just obtain worse with time. Because roof covering fixing is such a critical piece of motor home maintenance, we're sharing some vital pointers for searching for and fixing RV roofing openings.
The ever-changing environment can trigger caulking and seals to broaden and acquire repeatedly, which can eventually lead to openings, fractures, or spaces in the roof. Holes can also occur when you're on the move. A tree branch might scuff and pierce the roof if you were to ignore the elevation of a tree arm or leg, as an example.
If your Recreational vehicle occurs to be parked there at the time, your Recreational vehicle roof covering can endure comprehensive damage. Not all Motor homes have the exact same type of roofing, of program.
TPO roof coverings are offered in a selection of thicknesses, depending on the maker's specifications. Whether or not the thicker product is more reliable over the long run appears to be a warm subject in recreational vehicle discussion forums. TPO roofings have a laminate cover that aids maintain them from compromising and developing cracks.
Epdm Rv Roof Repair Placentia, CA
It can additionally be sealed with solvent welding and connected with adhesives. For an even a lot more extensive consider the different kinds of materials used for motor home roofs, have a look at PVC vs TPO vs EPDM RV Roofing System Options: Which Is the most effective Selection? Fiberglass is another typical RV roof covering material that's remarkably durable.
And be especially mindful if your roof covering is damp to ensure that you don't slide and diminish! A quick check of the sealant around vents, fans, solar panels, air conditioning system, and antennas every 30 days or so keeps our RV roofing in excellent problem, staying clear of potentially costly leaks. This Dicor sealant has actually fractured severely enough that it might easily be permitting water to penetrate through the roof covering and requires to be cleaned and re-sealed.
Try to find cracks and indications of setting or splitting up. You'll likewise wish to check locations around vents, air conditioning system, antennas, solar panels, and any added installations. Ridding your RV's roofing system of dangerous compounds is just one of the finest preventative actions you can take. You'll wish to do a general sweeping of your motor home's roof covering to get rid of excess fallen leaves and debris.
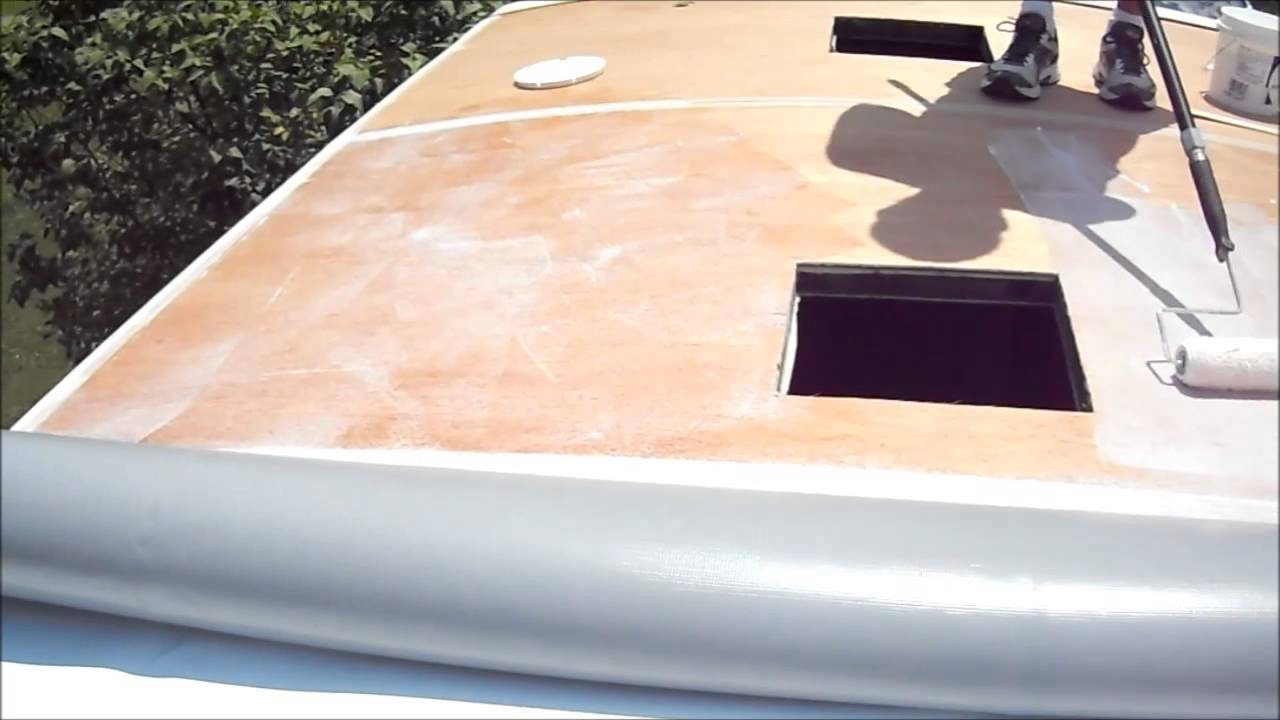
Rubber Roofing For Rv Placentia, CA
Next, spray the roofing with clean water to get rid of loosened dirt and crud. Throughout the cleaning process, provide added focus to areas where mold, mold, tree sap, bird droppings, or other stains are present. Wash completely and often to prevent residue and grime build-up.
Rv Roof Repair Service Near Me Placentia, CA
It is available in a number of different mixes of size & size, and a number of different colors: Clear your steel motor home roofing system of any kind of debris prior to you start a fixing. Examine the repair area very carefully and bear in mind of what's around it. Keep in mind, steel roof coverings can concealing real extent of any type of damage.
Eternabond is one of the most popular tapes (it can be found in a number of shades, consisting of gray which will likely match your steel roof covering much better than various other selections), which can really be used on any kind of sort of RV roofing system, and is basically long-term. The secret is to make certain any kind of seams are completely covered by the tape, overlapping if required.
Rv Roof Repair Service Near Me Placentia, CA
Considerable damage likely requires professional support, which can be costly. You're additionally at their mercy in regards to the repair service timeline. If you're helpful, it's feasible to deal with small cracks and blemishes in a fiberglass roof covering. Just understand your limitations and when to hire an expert to prevent future troubles.
Sand the broken location to provide a smooth surface area for fixing sealants. If you're confident, you can also use fiberglass resin, and fiberglass fabric if needed, to make the fixing yourself. For a lot of small damage, Eternabond is a great fallback, which nearly anyone can apply. We can not overemphasize the significance of preventative upkeep.
Rv Roof Repair Near Me Placentia, CA
Keep in mind that the warranty on your roofing might depend on having your recreational vehicle checked annually and proof that you've been doing preventative maintenance. Keeping your recreational vehicle roofing system seals is very important to avoid a leakage and serious damage. The seam where the rubber roofing system fulfilled the sidewalls enabled water to leak beneath, doing considerable (and expensive) damage to the underpinning.
Among one of the most important skills you can master for maintaining your recreational vehicle is roof repair. It's very easy to disregard damages to a RV roof, yet it is among the most essential elements of camper maintenance. Most people that have actually been RVing for any type of length of time have actually come to be familiar with the fact that they will certainly have to do some maintenance and repair work by themselves eventually.
When it comes to delaying Motor home maintenance and repair, one of the worst points that can happen is water damage. When there's a problem with your roof, it takes place promptly.
Rv Rubber Roof Repair Placentia, CA
These can weaken the roofing product over time, compromising it. There are cleansers created particularly for motor home roof coverings and each sort of product. If you're working on a large location, tape off the rest of your RV and cover it with plastic to stop roof covering cleaners or sealants from trickling down the sides.
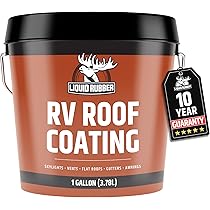
An additional thing that all motor home roofs share is the type of fixings that they can require. The sealant, joints, and spot openings and holes are the 3 products you could heal. If your EPDM or TPO rubber roofing seems half-cracked or milky, a fresh layer of sealant is what it needs.
When purchasing the rubber roof coatings or sealers, keep your recreational vehicle's dimensions in mind to ensure you receive the correct quantity. After cleaning the whole roof and allowing it to dry, apply a layer of paint to the roofing system utilizing a roller. Rv Roof Repair Near Me Placentia. Ensure to read and follow the guidelines on the sealer package for optimal preparation
A spot will certainly be required if you uncover a little leak or tear on your motor home roof. Luckily, makers have actually produced repair work and RV roof adhesives that are basic to apply and durable. Many spots require little prep work besides cleaning the damaged area and using the patch over it, just like a band-aid.
Epdm Rv Roof Repair Placentia, CA
Fiberglass roofing systems' top layer, like RV rubber roofing systems', can oxidize with time, giving them a half-cracked, milky appearance. Remove any type of loose, crinkled parts of the layer prior to cleaning and sand the roofing's surface area making use of fine to tool grit sandpaper afterwards. The coating will stick much better to a slightly abraded surface.
After the location has actually been smoothed and cleaned, include fiberglass spots and adhesive layer by layer, as directed by the fixing set. At the end, coat your motor home with a sealer to the task and redecorate the location as required. The resealing of light weight aluminum and other steel recreational vehicle roofing systems is done with a particular layer made for an aluminum roof covering product.
The easiest method to fix a steel roof with even more severe damages is to replace the metal panel, which is a procedure that may differ based on your motor home. You may be able to fix your steel roofing making use of a peel-and-stick patch relying on the extent of the damages. Make sure you select one that is especially planned for steel roof coverings, as the glue chemistry differs.
Best Rv Roof Repair Placentia, CA
A buddy needs to relocate into it rather fast. I'm thinking of utilizing 'blue board' foam insulation, in between the 'rafters' to stand up the roof product (which is presently drooping down) and make the roof covering drainpipe. I will also need to patch a pair small holes where a tree branch came down on the roof (water dripping in these holes is what deteriorated the plywood) and a few various other tiny areas where the rubber is doing negative.
I'm trying to find various techniques. Any kind of experiences and suggestions on repairing a camper roof? Thx-Ace.
They took up until last week to do it. The consumer was extremely distressed due to the fact that they had Spring Damage outdoor camping plans, and we didn't understand if we would certainly be able to get the repair services done in time due to all the hold-ups.
OCRV Center
Address: 23281 La Palma Ave Yorba Linda, CA 92887Phone: (714) 909-1444
Email: art@ocrvcenter.com
OCRV Center
He called Progressive and must have been not-so-nice because he got the adjustor's supervisor included. When the employer man spoke to the client, he was playing it up big. He stated so as to get the repairs done as soon as possible so they could make their journey, we can order parts overnighted and they would certainly cover it.
Rv Roof Repair Placentia, CARv Trailer Roof Repair Placentia, CA
Rv Rubber Roof Replacement Cost Placentia, CA
Repair Rv Roof Leak Placentia, CA
Rv Roof Repair Near Me Placentia, CA
Rubber Roof Installation Placentia, CA
Rv Roof Leak Repair Placentia, CA
Rv Roof Leak Repair Placentia, CA
Rubber Roof Installation Placentia, CA
Class C Rv Roof Repair Placentia, CA
Best Rv Roof Repair Placentia, CA
Replace Rv Roof Placentia, CA
Rv Roof Repair Near Me Placentia, CA
Rubber Roofing For Campers Placentia, CA
Rv Rubber Roof Replacement Cost Placentia, CA
Repair Rv Roof Placentia, CA
Motorhome Roof Replacement Placentia, CA
Roof Repair For Rv Placentia, CA
Rv Roof Repair Service Near Me Placentia, CA
Rv Slide Out Roof Repair Placentia, CA
Rubber Roofing For Rv Placentia, CA
Rv Rubber Roof Replacement Placentia, CA
Replace Rv Roof Placentia, CA
Rubber Roofing For Campers Placentia, CA
Motorhome Roof Replacement Placentia, CA
Rv Rubber Roof Replacement Cost Placentia, CA
Rv Roof Repair Service Near Me Placentia, CA
Repair Rv Roof Leak Placentia, CA
Rv Roof Repair Placentia, CA
Roof Repair For Rv Placentia, CA
Rv Roof Replacement Placentia, CA
Motorhome Roof Replacement Placentia, CA
Rv Rubber Roof Maintenance Placentia, CA
Rv Rubber Roof Replacement Cost Placentia, CA
Rubber Roofing For Rv Placentia, CA
Rubber Roof For Rv Placentia, CA
Rv Rubber Roof Replacement Placentia, CA
Rubber Roof For Rv Placentia, CA
Rv Rubber Roof Maintenance Placentia, CA
Rv Rubber Roof Repair Placentia, CA
Rv Roof Repair Near Me Placentia, CA
Rv Rubber Roof Replacement Placentia, CA
Rv Roof Repair Service Near Me Placentia, CA
Replace Rv Roof Placentia, CA
Rv Roof Repair Fiberglass Placentia, CA
Replace Rv Roof Placentia, CA
Replace Rv Roof Placentia, CA
Resealing Rv Roof Placentia, CA
Repair Rv Roof Leak Placentia, CA
Replace Rv Roof Placentia, CA
Rv Roof Leak Repair Near Me Placentia, CA
Rv Roof Maintenance Placentia, CA
Rv Rubber Roof Repair Placentia, CA
Resealing Rv Roof Placentia, CA
Rv Rubber Roof Maintenance Placentia, CA
Best Rv Roof Repair Placentia, CA
Rv Roof Repair Service Near Me Placentia, CA
Rv Fiberglass Roof Repair Placentia, CA
Rubber Roofing For Rv Placentia, CA
Roof Repair For Rv Placentia, CA
Rv Rubber Roof Replacement Cost Placentia, CA
Best Rv Roof Repair Placentia, CA
Best Rv Roof Repair Placentia, CA
Rv Rubber Roof Repair Placentia, CA
Rv Rubber Roof Maintenance Placentia, CA
Rv Rubber Roof Maintenance Placentia, CA
Repair Rv Roof Placentia, CA
Rubber Roof For Camper Placentia, CA
Rv Roof Repair Near Me Placentia, CA
Rv Roof Maintenance Placentia, CA
Rv Roof Repair Fiberglass Placentia, CA
Rv Fiberglass Roof Repair Placentia, CA
Rv Roof Repair Near Me Placentia, CA
Resealing Rv Roof Placentia, CA
Rv Trailer Rubber Roof Repair Placentia, CA
Rubber Roof Installation Placentia, CA
Motorhome Roof Replacement Placentia, CA
Resealing Rv Roof Placentia, CA
Finding A Seo Agencies Placentia, CA
Close By Seo Expert Placentia, CA
OCRV Center
Table of Contents
- – Rv Slide Out Roof Repair Placentia, CA
- – OCRV Center
- – Rv Roof Repair Placentia, CA
- – Repair Rv Roof Leak Placentia, CA
- – Rv Rubber Roof Replacement Placentia, CA
- – Class C Rv Roof Repair Placentia, CA
- – Epdm Rv Roof Repair Placentia, CA
- – Rubber Roofing For Rv Placentia, CA
- – Rv Roof Repair Service Near Me Placentia, CA
- – Rv Roof Repair Service Near Me Placentia, CA
- – Rv Roof Repair Near Me Placentia, CA
- – Rv Rubber Roof Repair Placentia, CA
- – Epdm Rv Roof Repair Placentia, CA
- – Best Rv Roof Repair Placentia, CA
- – OCRV Center
Latest Posts
Health Insurance For Retired Seal Beach
Evaporative Cooler Repair Near Me San Marino
Verdugo City Commercial Kitchen Ventilation
More
Latest Posts
Health Insurance For Retired Seal Beach
Evaporative Cooler Repair Near Me San Marino
Verdugo City Commercial Kitchen Ventilation