All Categories
Featured
Table of Contents
- – Rv Floor Repair Near Me Mira Loma, CA
- – OCRV Center
- – Rv Mechanics Near Me Mira Loma, CA
- – Rv Generator Repair Mira Loma, CA
- – Rv Delamination Repair Near Me Mira Loma, CA
- – Rv Mechanics Near Me Mira Loma, CA
- – Motorhome Generator Repair Near Me Mira Loma...
- – Rv Repair Service Near Me Mira Loma, CA
- – Rv Repair Services Near Me Mira Loma, CA
- – Rv Delamination Repair Near Me Mira Loma, CA
- – Rv Mechanics Near Me Mira Loma, CA
- – Rv Solar Installation Mira Loma, CA
- – OCRV Center
Rv Floor Repair Near Me Mira Loma, CA
I had actually one end appeared like your own. While we went to the rally in Copake, the Dometic representative existed and after taking a look, recommended using a plain object to push the the side back in. I had a piece of dowel rod that fit right into the network and made use of that.
There is a screw in photo number 3 that needs to be eliminated prior to servicing that end - Motorhome Refrigerator Repair Mira Loma. I found it much easier to extend the loosened part of the awning and wedge the actual end of the poly cable, that hard white line, right into the network and it will certainly hold it in position, releasing a hand, until you can take your "push things" and a hammer and start tapping the cord and afterwards awning/cord combination back in the network
Rv Mechanics Near Me Mira Loma, CA
When you have the awning back in the network, change the screw, making certain it either undergoes the poly cord or in front of the cord to pin it against the coach. If there is no screw on the other end, you require to place one in.
Hi all, We have a small tear in our plastic awning, AE, what is the most effective repair tape for vinyl awnings? Testimonials on Amazon are a variety.
Rv Generator Repair Mira Loma, CA
And for RV vacationers who prosper on meeting brand-new people in new locations, an awning is just one of the simplest and most efficient symbols of friendliness and sociability. So, what occurs when your recreational vehicle awning needs a little TLC? Awnings, like motor home engines, usually use down in time. They are executed numerous of the toughest aspects and weather condition kinds, as well as regular usage, which alone can create breakdowns and splits to the fabric.
Some usual attributes you'll discover when managing awning fixing include: This is, by far, the most constant problem of a damaged RV awning. And the good news is, it is also one of the most basic concerns to deal with. Despite usage (although older awnings will normally experience a higher quantity of damage), damages to material awnings can take place at any moment, under any condition.
Depending on the dimension of the opening or hole, Motor home proprietors have options. Like any mechanical attribute of your Recreational vehicle, after time, the awning arms, and/or the systems that move the arms into place, will discontinue to operate correctly.
If you have actually obtained an electric awning that unravels at the press of a switch, and it just chooses to quit working one day, you may have something much more serious on your hands than a dead remote battery. A break in the circuitry, a negative button, or a poor awning motor might be the offender.
Rv Delamination Repair Near Me Mira Loma, CA
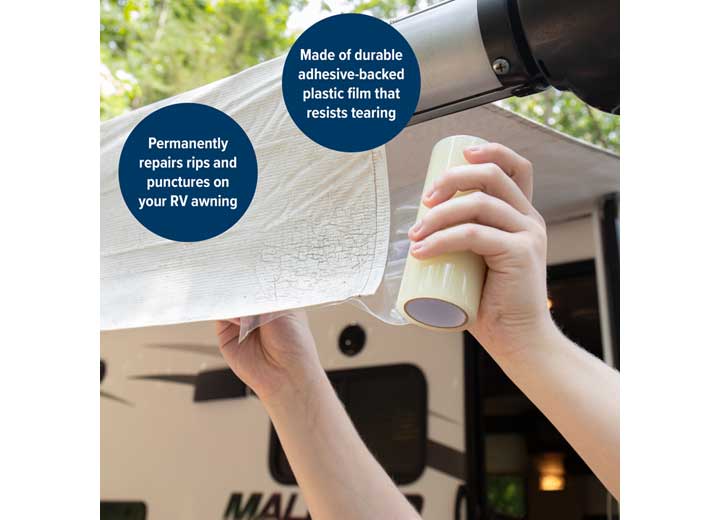
These products are offered from online sellers, and practically every neighborhood hardware shop. Once again, depending upon the dimension of the damage, awning repair service tape can be greater than a short-lived fix yet an enduring, irreversible option. The majority of types of repair tape are clear in color and enhanced to protect plastic, canvas, and various other sorts of long lasting textile, providing a waterproof seal that goes on clear, so you do not even observe it.
Or you can grab a camping tent repair work set: these often consist of solid sticky spots that adhere to a selection of different textiles. Around the very same price as repair tape, tent repair service packages are likewise available at hardware or camping shops. For slits and splits larger than regular, you'll intend to take into consideration something extra big than a routine spot work.
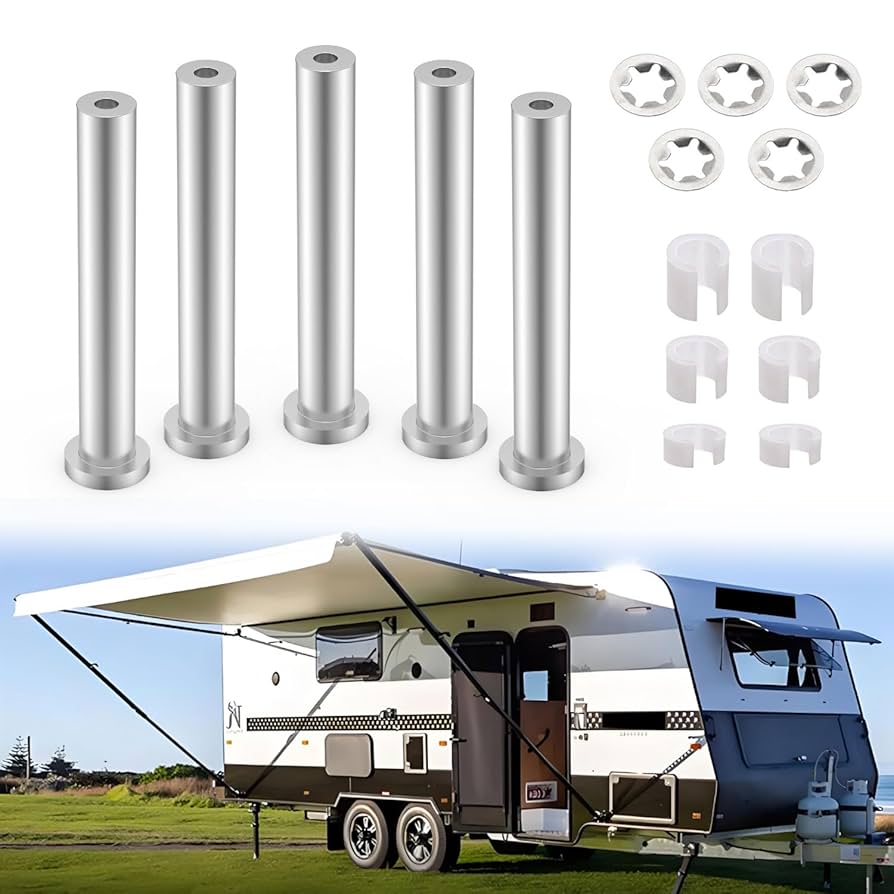
Occasionally, it's not just the awning textile that needs fixing. You may locate on your own aiming to change broken or missing parts to ensure that your awning stays in working order. If that holds true, there are some common bits to be mindful of: Handle Adjuster: this mechanism, normally found on the arm, enables you to change the stress on the awning material.
Rv Mechanics Near Me Mira Loma, CA
Do you have an internet site we can go to for more details?.
I agree with Gary, seems like the material is spoiling (peeling). I believe it's ideal at the side that is still revealing when the awning is rolled up. Because that area is always subjected to the sunlight and climate. One more alternative could be if you can find a furniture or canvas shop prepared to do it, you can possibly take the material off (google for instructions) and have them reduce off the broken part and resew the "bead" (in fact called "Keder welt") back on to it.
We have a 78' train and think that the awning is as old as the coach. Simply yesterday I was inspecting it and discovered both primary panels that are stitched with each other in the facility, have the sewing coming apart. I do not want to take the awning down for fixing.
2017 Coachmen Leprechaun Course C MH with a fundamental mechanical awning - gust of wind obtained it and drew the leading installs loose. Did not come completely off but the installing screws were drawn out concerning 3/4 of the way. As a temporary solution I was able to screw the bolts back in and they obtained fairly limited, really did not wish to go as well for and remove them out any type of even worse.
Motorhome Generator Repair Near Me Mira Loma, CA
You have actually drawn right into a prime outdoor camping spot in your precious RV and are looking forward to spending some soothing time in the wilderness. Your room is sunny and bright and perfect. Just one problemyour motor home awning isn't functioning. Yet don't misery! We're going to look at the different means your power awning might malfunction and exactly how to find out where the problems are.
If you're brand-new to RV life you may be questioning how your awning may malfunction. There are 3 primary root causes of awning problems: Power interruptions Motor failure Mechanical failings Let's repair all three (for awning fabric fixing, examine out this short article) Yet initially, a couple of tips. We're discussing power awnings today, which suggests electric motors and electricity.
Rv Repair Service Near Me Mira Loma, CA
It's simpler to have an awning stuck closed than to have it stuck open. You're free to drive your vehicle to the local RV service center right now. You can not drive your RV with the awning open also a bit. Since mechanized awnings do break and have other concerns, find out how to operate them by hand before you take your initial recreational vehicle trip.
In some cases you simply journey a breaker or blow a fuse. If you listen to no audio whatsoever when you try to prolong the awning, this is a common offender. These fast and very easy and do not need any particular competence. If you aren't knowledgeable about the fuse panel, have a look in your owner's manual for an overview.
First, examine your RV batteries. If your awning is just one of the initial things you use, its failing might be the indicator of a low battery or a malfunctioning converter. If your motor home has a built-in battery meter, superb! Otherwise, make use of a volt meter. Unplug from shore power and attempt the awning with the voltmeter on the battery.
Rv Repair Services Near Me Mira Loma, CA
If the major batteries take a look at penalty, you'll require to dig a little much deeper. It's time to take a look at the wiring and the power to the awning itself. This is where new individuals, unknown with RV electrical systems, must speak with a professional. A defective awning is unworthy an electrical fire or an injury.
Given that your awning won't extend, you'll require to open it a little bit by hand. Exactly how you access your awning motor will differ depending on your car.
You'll locate them in the trough running down the side of your motorhome or travel trailer from the electric motor. Transform off the power before you detach the wires from the automobile from the wires for the awning. Don't tinker real-time cords. You're going to check the circuitry below in two ways.
Next, take an excellent lengthy appearance at the awning cables. If every little thing looks intact, link the awning cords to a mobile battery.
Rv Delamination Repair Near Me Mira Loma, CA
If the awning does not function, the trouble remains in the electrical wiring in the awning arms or with the switch or electric motor. Head up to the electric motor and find the motor electrical wiring quick-connect. Examination with your volt meter when the switch is depressed. If you obtain +/- 12 volts from the switch, the electrical wiring is not the problem.
Before eliminating your malfunctioning electric motor, take the time to lash down the awning arms on both sides. Once the old motor is removed and disengaged from the gearing, the awning arms will prolong out promptly.
The majority of owners must have a professional do electric circuitry repair service and substitute. Currently it's time to connect the electric motor directly to a portable battery.
Rv Mechanics Near Me Mira Loma, CA
You can replace an awning electric motor yourself, however many of you should take the vehicle to a RV repair work shop. This is a DIY project only for seasoned RV fixer-uppers.
The mechanical parts of your recreational vehicle awning are just as susceptible to wear as the electrical wiring and motor. No issue how well an awning is developed, use, time, and exposure to the components will make fixings and replacement parts necessary. If you're a recreational vehicle fixing do it yourself fanatic, take a look at our Leisure Coachworks Parts Store for equipment, cables, illumination, locks, electrical supplies, and a lot a lot more.
Is your head spinning from all that info? We have actually stated it previously, yet it births duplicating: A motorhome or traveling trailer is a complex piece of equipment. Combining aspects of a residence and a vehicle leads to a lot of moving parts. For a few of you, this is an enjoyable obstacle and you like discovering every system.
It's clever to have a plan for what you'll do if they won't function, seem negative, or just break. Call us today at Leisure Coachworks and we'll aid you create a regular upkeep timetable to lower the possibility of any type of breakdowns when you're out living your finest motor home life.
Rv Solar Installation Mira Loma, CA
On a recreational vehicle, consistent direct exposure leads to damaged plastic parts and trim and can ruin rolled up awnings that are not shielded from the sunlight - Motorhome Refrigerator Repair Mira Loma. Commonly the top of the rolled awning shreds, making the product unpleasant at ideal and unsafe to present at worst. As long as the equipment is intact, there's no factor to replace the entire awning simply since the material is worn-out
OCRV Center
Address: 23281 La Palma Ave Yorba Linda, CA 92887Phone: (714) 909-1444
Email: art@ocrvcenter.com
OCRV Center
1) Remove screws that go through the awning rail right into the material. 2) Remove the lag screws from the front and rear upper brackets. 3) Glide the whole awning assembly out of either end of the awning rail. If your existing awning still has a tag with the model number and identification number, consult the producer to make sure that it is still the correct model number before purchasing brand-new material.
Full Service Rv Repair Near Me Mira Loma, CARv Repair Service Near Me Mira Loma, CA
Rv Repair Service Near Me Mira Loma, CA
Full Service Rv Repair Near Me Mira Loma, CA
Motorhome Repair Shop Mira Loma, CA
Motorhome Repair Shop Mira Loma, CA
Motorhome Service And Repair Near Me Mira Loma, CA
Full Service Rv Repair Near Me Mira Loma, CA
Rv Solar Panel Installation Mira Loma, CA
Motorhome Repair Service Mira Loma, CA
Motorhome Repair Shops Mira Loma, CA
Motorhome Service And Repair Near Me Mira Loma, CA
Rv Floor Repair Near Me Mira Loma, CA
Rv Repair In My Area Mira Loma, CA
Rv Service Repair Near Me Mira Loma, CA
Rv Repair Shops Near My Location Mira Loma, CA
Rv Generator Repair Mira Loma, CA
Rv Mechanics Near Me Mira Loma, CA
Motorhome Repair Shops Mira Loma, CA
Rv Repair In My Area Mira Loma, CA
Rv Repair Services Near Me Mira Loma, CA
Rv Mechanics Near Me Mira Loma, CA
Rv Plumbing Repair Near Me Mira Loma, CA
Rv Refrigerator Repair Near Me Mira Loma, CA
Rv Plumbing Repair Near Me Mira Loma, CA
Full Service Rv Repair Near Me Mira Loma, CA
Rv Solar Installation Mira Loma, CA
Rv Repair Shops Near My Location Mira Loma, CA
Motorhome Repair Shop Mira Loma, CA
Motorhome Awning Repair Mira Loma, CA
Rv Plumbing Repair Near Me Mira Loma, CA
Rv Service Repair Near Me Mira Loma, CA
Rv Floor Repair Near Me Mira Loma, CA
Rv Repair In My Area Mira Loma, CA
Full Service Rv Repair Near Me Mira Loma, CA
Rv Mechanics Near Me Mira Loma, CA
Rv Repair Centers Near Me Mira Loma, CA
Motorhome Repair Shops Mira Loma, CA
Camper Ac Repair Near Me Mira Loma, CA
Rv Plumbing Repair Near Me Mira Loma, CA
Rv Ceiling Repair Mira Loma, CA
Rv Repair Services Near Me Mira Loma, CA
Rv Service And Repair Near Me Mira Loma, CA
Rv Repair Service Near Me Mira Loma, CA
Motorhome Repair Service Mira Loma, CA
Rv Repairs Near Me Mira Loma, CA
Rv Delamination Repair Near Me Mira Loma, CA
Camper Ac Repair Near Me Mira Loma, CA
Motorhome Refrigerator Repair Mira Loma, CA
Rv Floor Repair Near Me Mira Loma, CA
Rv Repair Shops Near My Location Mira Loma, CA
Motorhome Repair Service Mira Loma, CA
Motorhome Refrigerator Repair Mira Loma, CA
Rv Repairs Near Me Mira Loma, CA
Rv Mechanics Near Me Mira Loma, CA
Motorhome Repair Near Me Mira Loma, CA
Rv Mechanics Near Me Mira Loma, CA
Rv Repair Places Near Me Mira Loma, CA
Best Rv Repair Near Me Mira Loma, CA
Rv Mechanics Near Me Mira Loma, CA
Rv Repair And Service Near Me Mira Loma, CA
Rv Repair Centers Near Me Mira Loma, CA
Rv Repair Shops Near My Location Mira Loma, CA
Rv Mechanics Near Me Mira Loma, CA
Rv Solar Panel Installation Mira Loma, CA
Rv Floor Repair Near Me Mira Loma, CA
Rv Repair Services Near Me Mira Loma, CA
Rv Repair Shops Near My Location Mira Loma, CA
Motorhome Repair Near Me Mira Loma, CA
Best Rv Repair Near Me Mira Loma, CA
Motorhome Refrigerator Repair Mira Loma, CA
Rv Repair Centers Near Me Mira Loma, CA
Motorhome Service And Repair Near Me Mira Loma, CA
Rv Service Repair Near Me Mira Loma, CA
Rv Service And Repair Near Me Mira Loma, CA
Rv Repair In My Area Mira Loma, CA
Rv Ceiling Repair Mira Loma, CA
Rv Delamination Repair Near Me Mira Loma, CA
Near Here Seo Marketing Agency Mira Loma, CA
Around Me Seo Services Near Me Mira Loma, CA
OCRV Center
Table of Contents
- – Rv Floor Repair Near Me Mira Loma, CA
- – OCRV Center
- – Rv Mechanics Near Me Mira Loma, CA
- – Rv Generator Repair Mira Loma, CA
- – Rv Delamination Repair Near Me Mira Loma, CA
- – Rv Mechanics Near Me Mira Loma, CA
- – Motorhome Generator Repair Near Me Mira Loma...
- – Rv Repair Service Near Me Mira Loma, CA
- – Rv Repair Services Near Me Mira Loma, CA
- – Rv Delamination Repair Near Me Mira Loma, CA
- – Rv Mechanics Near Me Mira Loma, CA
- – Rv Solar Installation Mira Loma, CA
- – OCRV Center
Latest Posts
Chino Hills Rv Delamination Repair Near Me
Diamond Bar Best Rv Repair Near Me
Rv Repair Shops Near My Location Mira Loma
More
Latest Posts
Chino Hills Rv Delamination Repair Near Me
Diamond Bar Best Rv Repair Near Me
Rv Repair Shops Near My Location Mira Loma