All Categories
Featured
Table of Contents
- – Rv Chairs La Habra, CA
- – OCRV Center
- – Awnings For Trailers La Habra, CA
- – Replacement Windows For Campers La Habra, CA
- – Rv Dining Table La Habra, CA
- – Awnings For Rv La Habra, CA
- – Rv Dining Table La Habra, CA
- – Awning Installation La Habra, CA
- – Rv Carpet Replacement La Habra, CA
- – Rv Interior Remodel La Habra, CA
- – Rv Dinette Booth La Habra, CA
- – Replacement Rv Refrigerator La Habra, CA
- – Replacement Windows For Rv La Habra, CA
- – Rv Floor Replacement La Habra, CA
- – OCRV Center
Rv Chairs La Habra, CA
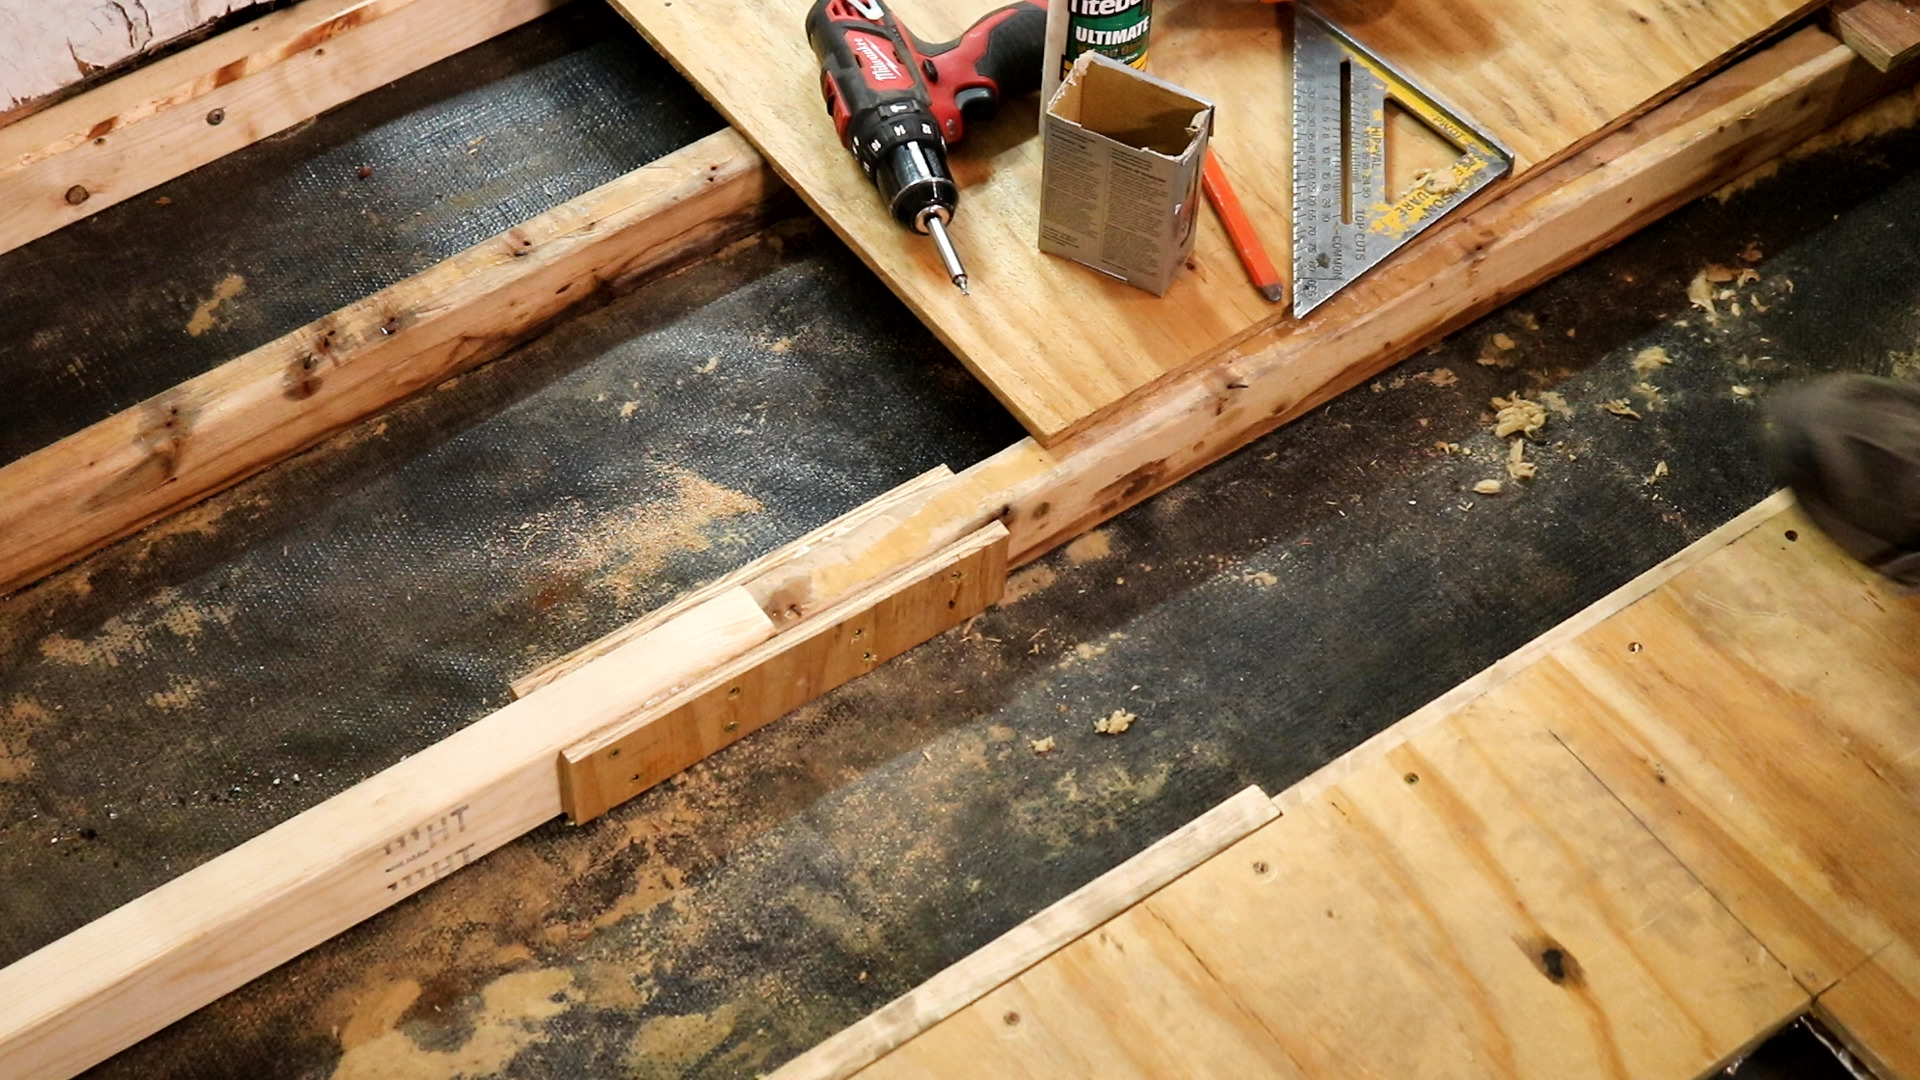
Before noontime Kerry called to tell me that they had the slide out and it would be an excellent time to find and get some pictures. I dropped by again soon after 4 pm and they had the new flooring cut, and David (pictured above) and Kerry had just glued the white protective Filon bottom on and had connected blue tape over the diagonal section which enables the floor to climb up and after that slide along the carpet of the internal floor of the motorhome.
So this is a thicker item of plywood, far better kind of plywood, and all-time low will certainly still have the protective sheet over it to maintain the water from striking the wood. He also is changing the trim which affixes the floor to the walls of the slide. They also had replace that black strip which the slide runs along the carpetthe old one was in a squandered state.
Awnings For Trailers La Habra, CA
They will trim it down to size, and install the flooring right into the slide out, and essentially placed every little thing back with each other once again. After an uneasy evening in the motel, I went back to McColloch's at 9 equipped with a couple loads donuts. Kerry was out, so I offered Nick both boxes of donuts and informed him that a person of them was for the guys across the road that assisted with the slide.
While there David revealed me how they were lining up the brand-new flooring to the old floor to attach the parts which obtain affixed to the 2 arms that move the slide in and out. I was intending to obtain an image of them placing the slide in, so I went back at 1 pm and discovered the slide was currently in.
Kerry appreciated of the donuts, and he stated the people nearby got their box and were really appreciative of them. When I initially spoke to McColloch's about doing this job when we were still in Florida, we were informed that we required to be prepared for it to be a 3-4 day job.
We are so delighted that the work just took 2 days, which implies just one evening in a motel. Simply before 5 pm Kerry calls me and tells me that they are done. I was down at Arden Fair Shopping Mall so it was a fast drive over to the store.
Replacement Windows For Campers La Habra, CA
Kerry said that the water invasion came along the length of the slide, picture left. He showed me the floor, and it was in even worse shape than that image I took and showed previously in this publishing.
I have checked out concerning others who had actually slide floors changed, and couple of have actually paid much less than this, numerous have paid much more (Rv Carpet Installation La Habra). This was a very easy slide, yet I understand Kerry and his staff did it right. High quality item of lumber, Filon to secure the outside base (which was the most expensive component of the materials used), 3-M tape, paint, and caulking together with numerous screws and equipment is the degree of the products used
The Filon is glued to the lumber and protects the outside base. The carpeting is stapled right into the top of the floor, and this floor is extremely extremely solidprobably far better than when it was new. We provide McColloch's recreational vehicle fixing and storage 2 large thumbs up. Currently days it is becoming rarer and rarer to discover credible establishments to repair our motorhomes and Recreational vehicles.
While I still have some points to do for our renovation, I am at a factor where I can call this reflooring project basically full. I thought I would certainly make a great cover up post below. Just how much did I finish up investing on the work? For how long did it take? And am I delighted I did it? Was it worth all the sweat and effort? Allow's dive in.
Rv Dining Table La Habra, CA
I started pulling the carpet out on March 31. That's about a month and a fifty percent total amount on the project. I was mainly functioning on weekends.
My other half and I flew to Paris, France in early April and were there for a week. I lost a week of working on the Motor home, however for a very worthwhile factor. I ended up shedding another weekend of job because I was waiting for Lowes to deliver me the flooring I picked.
So, in total amount, I worked with it for about 4 weekend breaks plus some weekdays here and there. Absolutely not a quick job! Well, I went through and found all the costs on my Visa (where I was systematizing expenditures so I can track it simpler). I had not been maintaining go to things and there were a couple of purchases which possibly included some things which had not been planned for the motor home.
The inquiry is How much would certainly this have cost if I had employed the task out? Well, the answer is one hell of a lot more than $1300! I didn't get any main price quotes before I began.
Awnings For Rv La Habra, CA
Without seeing it, he approximated in the $3,000 array, if I remember. I do not keep in mind the precise amount. I keep in mind assuming it was rather high. Keep in mind, as well, that that would certainly have been a direct carpet substitute. No timber flooring. Simply replacing initial carpet with brand-new carpeting. The issue is that several carpet people simply don't desire a task similar to this.
It is a lot less complicated to make money slapping rug into stick-and-brick homes. For this factor, carpeting installers for RVs bill an arm and a leg for it. I drew out the laminate floor covering.
All in all, I'm presuming that this task would certainly have easily been a $6,000-$7,000 work if I had actually employed it out. One thing is for certain, it would have been costly.
New floor covering might make the gear easier to market when the moment comes, but is it mosting likely to inherently make the motorhome better? Not actually. I simply don't believe I might have brought myself to go down $7,000 on this work for a 2002 motorhome. Doing it myself was far more sensible.
Rv Dining Table La Habra, CA
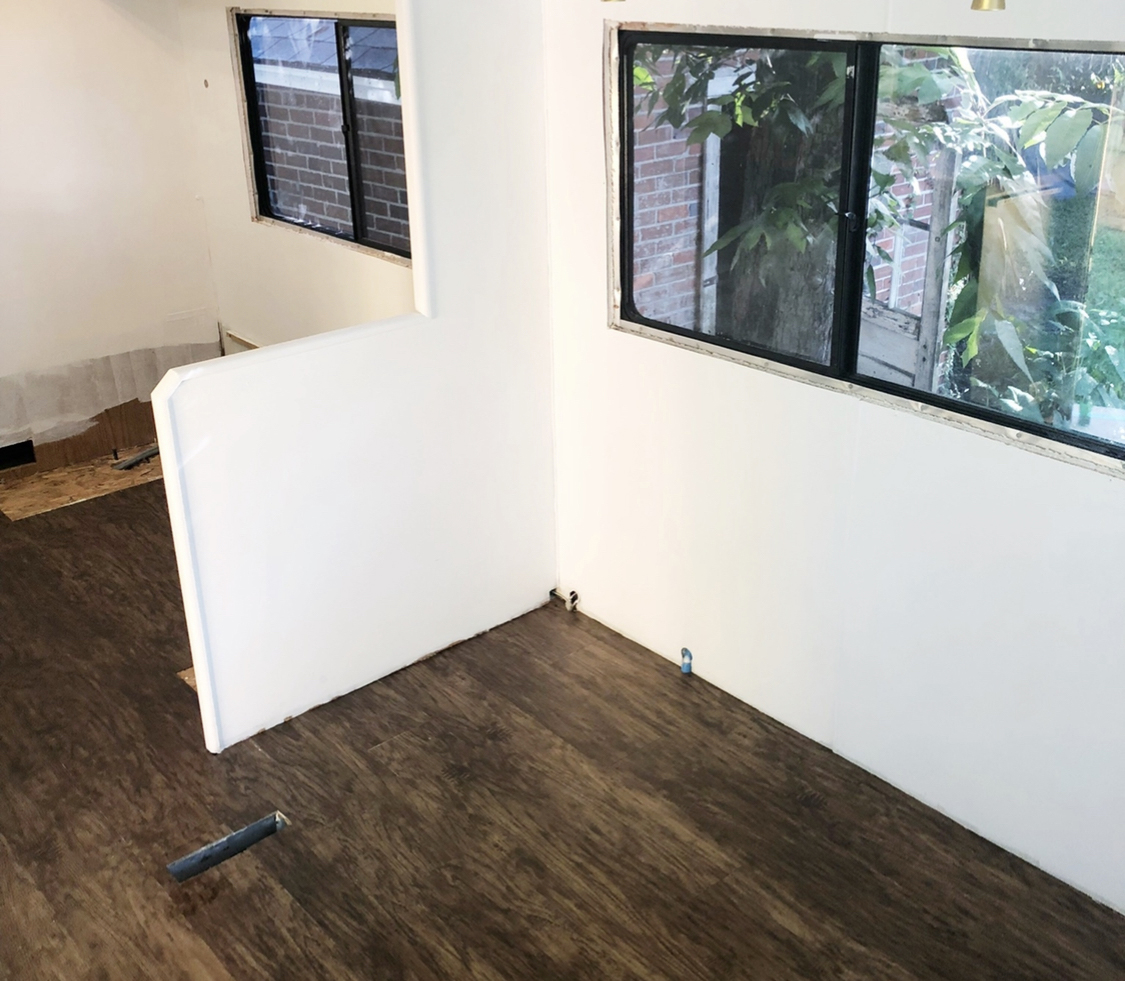
I might as well conserve the money on the floor so I can invest some of the financial savings on that furnishings? That old carpet was just terrible. The whole look of the interior altered with new floor covering.
Next off up, there's certainly the financials. I truly do assume that $6,000 is a conventional price quote wherefore the work would certainly have expense. I invested about $1,300. I saved AT LEAST around $4,700 by doing it myself. Likely much more than that. There's one other factor, as well. This task required me doing a whole lot of things I have actually never ever done.
I acquired several brand-new skills. I have some new devices to utilize in the future.
Awning Installation La Habra, CA
You recognize the job high quality. And I truthfully assume it runs and works better that means. It is that human element that assists keep these things in good shape.
Is the task ideal? On the whole, I think it came out damn good! I'll share a brand new walk-through video clip of the entire thing once I get the brand-new furniture in and the rug binding is done.
Rv Carpet Replacement La Habra, CA
ISSUE: The toilet was not firm on the floor. I eliminated the bathroom from the flooring and located the flange gasket intact but the floor deteriorated around the toilet flange. When getting rid of the toilet, I located the water system installation was loose at the toilet. This allowed water to run down the supply line, drip onto the flooring, and run hidden over the side of the plastic into the flange location of the floor.
This became a great option because of the product itself AND the email help I received from Dr. Rot - Rv Carpet Installation La Habra. Adhering to are the steps I took in the repair service, with pictures for every action: Step One: Removed Toilet and Analyzed DamageHere the bathroom and flange are gotten rid of. In our instance the flange unscrews on its 3 women string
Roughly a square foot of the floor is deteriorated. The most awful locations appear like wet coffee grounds. The trainer has a sheet metal base under the floor covering and there are a pair inches of Styrofoam insulation in between. In this photo, I have actually used a "hook blade" in the utility blade and have actually reduced the plastic flooring covering far from the flange area.
Thetford sells a "stand" which raises motor home toilets to home bathroom height. The pedestal has a much larger footprint than a bathroom, and the pale line on the floor covering is the footprint of the pedestal. The dark line is an inch in from the pedestal footprint. I reduced the floor covering out along that line.
Rv Interior Remodel La Habra, CA
Tools were a pocketknife and a vacuum cleanser. I set out the holding tank inlet on a cardboard design template and reduced the template to fit the area where rotted OSB was removed. Step 2: Cut New OSB Repair Service Patch from TemplateIn this photo, the patch is in place with the flange and pedestal screws.
I've cut the floor covering far from the wall behind the bathroom and the vanity beside the commode to gain better access to the damage. I additionally made a cut near the much back corner to be able to raise the plastic off the beaten track. Step 3: Applied Rot Doctor CPES * I acquired the Warm Climate Two-Pint Device # 101 and blended a number of little batches for each and every application.
The damaged timber obtained firm yet not "brand-new timber hard." I'm certain that rot was apprehended and appropriate stamina restored. Notice that an opening appeared between both canisters. It's not in a location that any person can stand on, so I made a decision to just span it with a small piece of sheet aluminum.
Rv Dinette Booth La Habra, CA
I used a carpenter's square to outline the placing openings so the commode would return in location right. Tip Six: Flooring ReinstalledI used prefinished quarter round molding and predrilled it for drywall screws. I got rid of the light weight aluminum piece showing below since it kept the pedestal from relaxing flat on the floor.
We are below to aid our clients solve their issues. Let us aid you to not have any surprises in your repair service job. Our business hours are 6:30 AM to 5:30 PM Pacific Time, MondayFriday. Technology support is available over weekend breaks and vacations 8:30 AM to 5:30 PM Pacific Time.
Replacement Rv Refrigerator La Habra, CA
Take a look at the flooring in your Recreational vehicle. If you said yes to any of those, it might be time for brand new flooring in your rig that you picked simply for you. For virtually 14 years, Bradd & Hall has been changing and installing brand-new floorings in the Motor homes of our clients.
One of one of the most usual floorings we install is carpeting. Carpet assists maintain a regular temperature inside regardless of the climate outside due to its fantastic insulation capacities. Right here are a few various other amazing elements of carpet: Cost-effective Easy to install Easier for the senior and pets to walk on Among minority adverse aspects of carpet is the capability to draw in dust and particles at a pretty fast rate, so the maintenance is a bit greater than the majority of other products.
Replacement Windows For Rv La Habra, CA
It is available in great deals of various shade choices, such as cherry, ash, and maple, and these colors can really make your rig luster. Hardwood also comes in numerous textures, which is why it's one of the most popular choices for RV flooring. It can be refinished, also, which offers you alternatives to personalize down the roadway without paying for new product.
Ceramic is made from clay, so your ceramic tiles would be immune to warmth and can take on the roughest of direct influence. Ceramic additionally doesn't take in wetness, making it an excellent option for those in rough climates. It's been known to outlive most of the various other flooring options available, too.
It comes in an unlimited quantity of styles and color options that make it one of the most convenient means to insert your very own style and personality in your gear. Plastic is cheaper than ceramic, but it's strong, so it makes a wonderful alternative for those trying to find an economical option.
Rv Floor Replacement La Habra, CA
We wish this obtains you started on the trip towards discovering the ideal replacement floor covering for you. And, when you pick us, recognize you're getting high quality products and customer solution. Desiring to change any of your Recreational vehicle furniture yet don't recognize where to start?
OCRV Center
Address: 23281 La Palma Ave Yorba Linda, CA 92887Phone: (714) 909-1444
Email: art@ocrvcenter.com
OCRV Center
Our goal is to work directly with you to guarantee your outright complete satisfaction during your remodel. We can direct you every action of the way.
Rv Chairs La Habra, CARv Refrigerator Replacement La Habra, CA
Rv Dining Table La Habra, CA
Rv Couch La Habra, CA
Rv Sofa Beds La Habra, CA
Rv Sofa Sleeper La Habra, CA
Rv Interior Remodel La Habra, CA
Motorhome Carpets La Habra, CA
Rv Couch Bed La Habra, CA
Rv Upholstery La Habra, CA
Rv Couch La Habra, CA
Rv Interior Furniture La Habra, CA
Rv Couch La Habra, CA
Rv Upholstery La Habra, CA
Rv Couch Bed La Habra, CA
Rv Microwave Replacement La Habra, CA
Rv Restoration Companies La Habra, CA
Rv Sofa Sleeper La Habra, CA
Awning Installation La Habra, CA
Awning Installation La Habra, CA
Rv Sofas La Habra, CA
Replace Rv Flooring La Habra, CA
Rv Dinette Table La Habra, CA
Rv Couch La Habra, CA
Rv Couch Bed La Habra, CA
Rv Couch La Habra, CA
Rv Restoration Companies La Habra, CA
Awnings For Rv La Habra, CA
Rv Couch La Habra, CA
Rv Dinette Booth La Habra, CA
Rv Interior Remodel La Habra, CA
Rv Refrigerator Replacement La Habra, CA
Replace Rv Flooring La Habra, CA
Rv Interior Furniture La Habra, CA
Rv Replacement Awnings La Habra, CA
Motorhome Carpets La Habra, CA
Awning Installation La Habra, CA
Replacement Rv Windows La Habra, CA
Replace Rv Flooring La Habra, CA
Replacement Rv Windows La Habra, CA
Rv Upholstery La Habra, CA
Rv Dining Table La Habra, CA
Rv Carpet Installation La Habra, CA
Rv Couch La Habra, CA
Rv Dinette Table La Habra, CA
Replacement Windows For Rv La Habra, CA
Rv Interior Remodel La Habra, CA
Rv Upholstery La Habra, CA
Rv Carpet Installation La Habra, CA
Rv Dinette Table La Habra, CA
Rv Dinette Table La Habra, CA
Rv Floor Replacement La Habra, CA
Rv Couch La Habra, CA
Rv Dining Table La Habra, CA
Replacement Rv Refrigerator La Habra, CA
Remodeling Rv La Habra, CA
Rv Couch La Habra, CA
Replace Rv Flooring La Habra, CA
Rv Restoration Companies La Habra, CA
Rv Replacement Awnings La Habra, CA
Rv Microwave Replacement La Habra, CA
Awnings For Trailers La Habra, CA
Rv Dinette Booth La Habra, CA
Rv Restoration Companies La Habra, CA
Rv Microwave Replacement La Habra, CA
Replacement Windows For Campers La Habra, CA
Awning Installation La Habra, CA
Rv Replacement Furniture La Habra, CA
Rv Couch La Habra, CA
Rv Carpet Installation La Habra, CA
Rv Microwave Replacement La Habra, CA
Rv Sofas La Habra, CA
Rv Chairs La Habra, CA
Rv Sofas La Habra, CA
Rv Sofa Beds La Habra, CA
Replacement Windows For Campers La Habra, CA
Rv Restoration Companies La Habra, CA
Rv Replacement Awnings La Habra, CA
Close To Me Seo Optimization La Habra, CA
Close To Me Top Seo Company La Habra, CA
OCRV Center
Table of Contents
- – Rv Chairs La Habra, CA
- – OCRV Center
- – Awnings For Trailers La Habra, CA
- – Replacement Windows For Campers La Habra, CA
- – Rv Dining Table La Habra, CA
- – Awnings For Rv La Habra, CA
- – Rv Dining Table La Habra, CA
- – Awning Installation La Habra, CA
- – Rv Carpet Replacement La Habra, CA
- – Rv Interior Remodel La Habra, CA
- – Rv Dinette Booth La Habra, CA
- – Replacement Rv Refrigerator La Habra, CA
- – Replacement Windows For Rv La Habra, CA
- – Rv Floor Replacement La Habra, CA
- – OCRV Center
Latest Posts
Mobility Van Repair Near Me Norco
Mercedes Sprinter Van Repair Near Me Orange County
Painting Fiberglass Motorhome Montclair
More
Latest Posts
Mobility Van Repair Near Me Norco
Mercedes Sprinter Van Repair Near Me Orange County
Painting Fiberglass Motorhome Montclair