All Categories
Featured
Table of Contents
- – OCRV Center
- – What Makes the Best RV Repair Services for Mot...
- – Comprehensive One-Stop Solutions for Motorhom...
- – Expertise in Motorhome-Specific Challenges
- – Transparent Processes and Communication
- – How Much Does RV Interior Remodeling Southern ...
- – Factors Influencing Remodeling Costs
- – Value Breakdown by Upgrade Type
- – Avoiding Hidden Fees in Quotes
- – What Is Involved in Professional RV Interior R...
- – Initial Consultation and Design Phase
- – Tear-Down and Preparation
- – Installation and Customization
- – Final Testing and Quality Assurance
- – Why Choose Experts for RV Interior Remodeling ...
- – Professional Quality and Safety Standards
- – Time and Cost Efficiency
- – Comparison to Common Alternatives
- – Popular Upgrades in RV Interior Remodeling Sou...
- – Custom Cabinetry and Storage Solutions
- – Kitchen and Bathroom Transformations
- – Flooring and Lighting Enhancements
- – Off-Grid and Luxury Add-Ons
- – Real Results from RV Interior Remodeling South...
- – Before-and-After Examples Overview
- – Customer Experiences
- – Increased Satisfaction and Value
- – Serving Motorhome Owners Across Southern Calif...
- – Regional Accessibility
- – Tailored to Local Conditions
- – Common Concerns About RV Interior Remodeling S...
- – Budget Overruns and Unclear Pricing
- – Quality and Durability Worries
- – Timeline and Downtime Fears
- – We Can Help! Contact Us Today
- – Frequently Asked Questions About RV Interior R...
- – OCRV Center
RV interior remodeling southern California remains among the top-requested and most impactful services among recreational vehicle owners seeking to revitalize their living spaces. This specialized work converts worn and restricted interiors into updated, practical living environments that enhance comfort, usability, and enjoyment during travel. Professional RV interior remodeling southern California resolves frequent problems like deteriorated custom cabinetry, poor space configurations, outdated flooring, and inadequate illumination while integrating robust materials suited to California's intense sunlight, high temperatures, and highway demands. Owners gain increased storage, better flow, energy-efficient features, and higher resale value through careful improvements. The process combines design expertise, precise craftsmanship, and motorhome-specific knowledge to produce outcomes that seem personally crafted for everyday travel. Whether updating a weekend getaway rig or completely overhauling a full-time motorhome, RV interior remodeling southern California eliminates routine irritations and elevates the entire adventure experience. For more on comprehensive RV repair services, check available services.
Many RV owners embark on travels brimming with enthusiasm, only to realize the interior imposes frustrating constraints. Cramped cooking areas make food preparation difficult. Insufficient storage causes ongoing mess. Aging surfaces show every mile traveled. These problems occur frequently throughout California, where RVs face relentless exposure to direct sunlight, salty coastal air, and rough highway conditions. Owners often search for RV interior remodeling southern California, custom RV cabinetry southern California, or RV kitchen remodel southern California looking for reliable, long-term improvements. The proper professional service turns these issues into strengths—effortlessly closing cabinets, generous flooring, and vibrant lighting turn frustration into satisfaction. Professional execution makes the upgrade process feel easy and rewarding. Understanding what sets exceptional RV repair services for motorhomes in California apart is essential.
What Makes the Best RV Repair Services for Motorhomes in California Stand Out?
The highest-quality RV repair services for motorhomes in California offer comprehensive, coordinated solutions beyond basic fixes, ensuring every aspect of the vehicle receives coordinated attention from a single skilled team. These services recognize the distinctive build of motorhomes, accounting for load distribution, slide-out operation, frame variations, and interior constraints, enabling improvements to strengthen rather than weaken functionality. Integrated services let owners manage structural repairs, electrical upgrades, plumbing work, and interior cosmetics without multiple-provider coordination, which often leads to delays, mismatched quality, and higher costs.
Comprehensive One-Stop Solutions for Motorhome Needs
Integration of Repairs and Upgrades — Combining mechanical repairs with custom RV cabinetry installations and RV flooring upgrades produces seamless outcomes without requiring multiple appointments and logistics. This single-team method saves considerable time and minimizes mismatched work risks. Focus on Durability in California's Climate — Materials chosen specifically withstand UV fading, coastal salt damage, and inland heat expansion. This attention to regional conditions extends the life of interiors significantly.
Expertise in Motorhome-Specific Challenges
Handling Class A, B, C, and Super C Variations — Technicians possess in-depth knowledge of different motorhome classes, addressing variations in chassis engineering, weight distribution, and slide mechanics to prevent strain throughout improvements. Addressing Slide-Out and Structural Issues — Reinforcement, sealing, and alignment work ensure reliable function and stop leaks or breakdowns that often develop over time.
Transparent Processes and Communication
Clear Timelines and Updates — Owners receive consistent progress reports and milestone notifications, preventing uncertainty across multi-week or multi-month projects. This clear communication builds assurance and enables better scheduling around trips. Data from RV associations shows integrated providers cut project-related stress by as much as 40% versus fragmented services. The best RV repair services for motorhomes in California alleviate emotional strain from vendor juggling while offering logical efficiency through unified processes. Contact local specialists for a complimentary assessment of your motorhome. For additional information on related RV service processes, check available information.
How Much Does RV Interior Remodeling Southern California Typically Cost?
RV interior remodeling southern California pricing depends on several variables including the motorhome's size, the extent of customization, material quality, and specific upgrades selected. Standard projects span $5,000 to $25,000, with smaller targeted updates such as custom RV cabinetry refacing or partial RV flooring replacement landing in the $5,000–$10,000 range. Full transformations involving kitchen renovations, bathroom redesigns, custom storage, and lighting upgrades typically fall between $15,000 and $25,000 or higher with luxury features. Detailed pricing information supports effective financial planning and eliminates unexpected costs.
Factors Influencing Remodeling Costs
Scope of Custom Cabinetry and Storage — Including pull-outs, soft-close features, corner solutions, and built-in storage greatly boosts organization and increases both materials and labor expense. These features directly address common complaints about limited storage in motorhomes. Materials for Flooring and Wall Paneling — Superior-grade vinyl plank, laminate materials, or moisture-resistant wall coverings have higher initial costs but offer outstanding resistance to scratches, spills, and UV fading.

Value Breakdown by Upgrade Type
Kitchen and Bathroom Renovations — Incorporating compact appliances, moisture-sealed counters, ventilated cabinets, and efficient fixtures improves everyday routines and avoids typical issues like mold or poor performance. These changes provide substantial improvements in usability and hygiene. Lighting and Electrical Enhancements — Switching to LED lighting lowers energy use, enhances illumination, and produces more welcoming environments across the motorhome.
Avoiding Hidden Fees in Quotes
Benefits of Bundled Services — Grouping RV kitchen remodel southern California, custom cabinetry, and RV flooring upgrades decreases total investment through shared resources while guaranteeing consistent craftsmanship. Transparent, detailed estimates eliminate uncertainty and foster trust in the investment. Owners realize ongoing savings through high-quality materials and expert installation that avoid future repairs. Request a no-obligation detailed quote to explore exact options for your motorhome. Review related RV maintenance services for preventive measures.
What Is Involved in Professional RV Interior Remodeling Southern California?
Professional RV interior remodeling southern California utilizes a well-organized, phased approach created to safeguard the motorhome, match owner goals, and deliver long-lasting, superior outcomes. The sequence begins with a thorough consultation to document goals, lifestyle requirements, budget parameters, and any specific preferences. Then, design phase encompasses accurate measurements, layout optimization, and material choices suited to the motorhome type and planned use. Preparation involves safe removal of existing components and any necessary structural repairs. Custom fabrication and installation occur with precision, followed by comprehensive testing to verify functionality, safety, and durability under real-world conditions. This methodical approach minimizes disruption and maximizes satisfaction.
Initial Consultation and Design Phase
Personalized Layout Assessments — Specialists take detailed measurements of all interior spaces to find possibilities for better flow, organization, and usability within motorhome weight and balance limits. These assessments ensure every upgrade complements the vehicle's engineering rather than conflicts with it. Material Selection for Longevity — Recommendations prioritize RV-rated products that balance weight, moisture resistance, UV stability, and ease of cleaning for extended performance in Southern California's diverse climates.
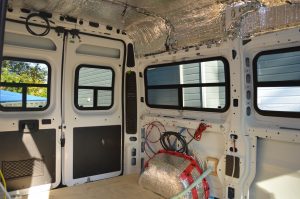
Tear-Down and Preparation
Safe Removal of Outdated Elements — Methodical disassembly protects structural elements and existing systems from damage during the removal process. This careful approach preserves vehicle integrity and prevents costly additional repairs. Subfloor and Structural Checks — Inspection and repair of hidden issues such as water intrusion, weakened supports, or delamination occur before proceeding to ensure a solid foundation for new installations.
Installation and Customization
Custom Cabinetry Precision — Custom cabinetry is crafted and positioned on-site with accurate measurements to ensure perfect fit, solid stability, and harmonious blending with existing components. Flooring and Upholstery Integration — Flooring is laid with few seams and clean transitions, and upholstery coordinates seamlessly with cabinetry and wall surfaces for unified appearance.
Final Testing and Quality Assurance
Functionality and Durability Checks — Every component, from slide-outs and cabinet doors to lighting circuits and appliances, undergoes repeated testing to confirm reliable operation and resistance to vibration and environmental stress. This thorough testing converts early doubt into full assurance, providing consistent quality that validates the investment with long-term reliable service. Schedule your no-pressure consultation to begin planning your transformation. Check related RV slide-out repair options when applicable.
Why Choose Experts for RV Interior Remodeling Southern California Over DIY?
Selecting experienced professionals for RV interior remodeling southern California reliably delivers better results than self-managed projects, particularly in motorhomes where structural integrity, weight distribution, electrical safety, and material compatibility require specialized knowledge. Experts bring specialized equipment, established methods, and manufacturer-endorsed materials that guarantee improvements strengthen rather than weaken vehicle performance and safety. DIY attempts often miss essential RV-specific considerations, leading to problems like incorrect weight distribution, electrical dangers, or early material breakdown that require expensive fixes or create safety concerns.
Professional Quality and Safety Standards
Certified Techniques and Materials — Work adheres to recognized RV industry standards and meets applicable safety requirements to avoid future problems or dangers. Warranty and Satisfaction Guarantee — Broad warranty protection covers workmanship and material defects, delivering ongoing assurance and peace of mind.
Time and Cost Efficiency
Reduced Downtime — Organized expert teams finish projects faster and more efficiently than individual efforts, reducing time away from the road - Foothill Ranch Rv Dinette Booth. Long-Term Resale Value Boost — Professionally executed upgrades significantly increase market appeal and resale prices when the time comes to sell or trade
Comparison to Common Alternatives
Fragmented Vendor Issues — Working with separate contractors for different parts of the project commonly leads to timing conflicts, inconsistent workmanship, and increased expenses. Professional work offers exceptional expertise and absolute assurance, far exceeding the constraints and hazards of DIY or multi-vendor approaches. Compare your options with a free review. For collision repair needs, explore RV collision repair services.
Popular Upgrades in RV Interior Remodeling Southern California
RV interior remodeling southern California typically features focused enhancements that tackle the most typical owner concerns while integrating features designed for California's active lifestyle and tough environmental challenges. These upgrades emphasize space optimization, daily usability, energy savings, and lasting durability against UV exposure, humidity, and road vibration. Owners notice instant gains in organization, appearance, and usability that enhance every journey.
Custom Cabinetry and Storage Solutions
Refacing vs. Full Replacement — Cabinet refacing provides an affordable refresh with new doors, hardware, and finishes while full replacement allows complete redesign for optimal organization and modern appearance. Space-Optimizing Designs — Pull-out drawers, corner organizers, vertical storage systems, and versatile cabinets convert wasted spaces into efficient storage areas that minimize clutter and enhance access.
Kitchen and Bathroom Transformations
Modern Appliance Integration — Compact fridges, induction cooktops, convection ovens, and low-profile sinks fit RV limitations while greatly enhancing cooking efficiency and ease. Foothill Ranch Rv Dinette Booth. Moisture-Resistant Features — Sealed countertops, ventilated cabinets, and mold-resistant materials avoid common issues in coastal humidity or rainy periods
Flooring and Lighting Enhancements
Durable, Easy-Clean Options — Luxury vinyl plank flooring resists scratches, spills, fading, and heavy foot traffic while remaining lightweight and easy to maintain. Energy-Efficient LED Upgrades — LED task lighting, ambient strips, and recessed fixtures decrease battery drain and create brighter, more attractive interiors throughout.
Off-Grid and Luxury Add-Ons
Solar and Power System Ties — Integrated wiring, inverter enhancements, and larger battery banks allow extended boondocking while maintaining interior comfort and contemporary conveniences. These enhancements satisfy emotional needs for personalized, pride-worthy spaces while providing logical benefits like simpler maintenance, lower running costs, and improved resale value. Discover which upgrades best suit your motorhome. View project examples in the photo gallery.
Real Results from RV Interior Remodeling Southern California Projects
Finished RV interior remodeling southern California projects regularly generate noticeable improvements in comfort, organization, and general satisfaction that owners appreciate right away and value long-term. Updated interiors seem more open, brighter, and more organized, eliminating ongoing frustrations and forming spaces that truly enhance RV lifestyle.
Before-and-After Examples Overview
Space Maximization Successes — Elimination of large fixed furniture paired with strategic custom cabinetry dramatically expands living spaces and enhances movement throughout the motorhome. Comfort and Style Improvements — Refreshed surfaces, contemporary lighting, and ergonomic designs produce a welcoming, home-like atmosphere that feels clean and appealing.
Customer Experiences
"Radically improved our journeys—feels like a brand-new, spacious home after the full remodel." — John from Anaheim. "The professional crew managed every step without any issues, and the final quality surpassed what we hoped for." — Sarah T., Riverside owner. "The refreshed kitchen and flooring made everyday living far easier—highly recommend this quality workmanship." — Mike from Irvine. These authentic testimonials show reliable positive results and excellent satisfaction.
Increased Satisfaction and Value
Higher Resale and Adventure Enjoyment — Renovated motorhomes secure better resale values and turn every trip or adventure into a more relaxing and enjoyable experience. Proven results create lasting confidence and demonstrate reliable success across different motorhome styles. Discover what’s achievable for your motorhome through customer testimonials.
Serving Motorhome Owners Across Southern California
Motorhome owners in RV interior remodeling southern California gain from area-specific service that provides convenient locations and lowers travel effort. Facilities strategically located near major transportation corridors offer straightforward drop-off and pickup for residents throughout the area.
Regional Accessibility
Convenient for Inland Empire and Coastal Areas — Service coverage extends seamlessly from desert communities in the east to beachside locations in the west, accommodating owners regardless of their specific location within Southern California. This broad reach ensures timely project completion without excessive driving.
Tailored to Local Conditions
Protection Against Sun, Salt, and Heat — Interior upgrades incorporate UV-resistant fabrics, corrosion-resistant hardware, and heat-tolerant materials specifically chosen to withstand Southern California's diverse environmental challenges. Regional RV interior remodeling southern California specialists provide locally suitable solutions rapidly and efficiently. Get area-specific guidance. For inquiries and appointments, see the contact page.
Common Concerns About RV Interior Remodeling Southern California and How Experts Solve Them
Owners frequently express concerns about RV interior remodeling southern California related to budget control, material durability, project duration, and final quality outcomes. Professional teams methodically resolve each worry using proven methods, open communication, and demonstrated results that create trust throughout.
Budget Overruns and Unclear Pricing
Transparent Quotes and Ranges — Comprehensive, itemized quotes precisely detail every cost element including materials and labor, enabling precise budgeting and preventing surprise charges. This upfront clarity helps owners plan confidently without financial surprises.
Quality and Durability Worries
High-Quality Materials and Standards — Material selection emphasizes RV-approved products proven to resist constant motion, temperature variations, moisture, and UV exposure without premature wear or failure. Adherence to industry standards guarantees dependable long-term durability.
Timeline and Downtime Fears
Efficient One-Roof Scheduling — Integrated team coordination keeps progress consistent, limits vehicle downtime, and holds project schedules even when unexpected issues emerge during tear-down or installation. Handling concerns transparently and directly builds clarity and assurance. Share your specific concerns to see how solutions fit your requirements. For more service details, review RV maintenance services.
We Can Help! Contact Us Today
If outdated interiors continue limiting your motorhome enjoyment, professional RV interior remodeling southern California offers the change you want. Imagine entering a completely refreshed space—smooth-operating custom cabinetry, efficient and modern RV kitchen remodel southern California, durable and attractive RV flooring upgrades, and bright, energy-efficient lighting—that feels custom-designed specifically for your lifestyle and travel habits. The daily frustration of cramped layouts, constant clutter, difficult cleaning, and poor lighting disappears entirely, replaced by excitement for upcoming trips and genuine pride in a motorhome that truly reflects your preferences and needs. Emotionally, these upgrades bring immediate relief from ongoing annoyances, renewed enthusiasm for travel, and a deep sense of accomplishment in having a space you genuinely love returning to after every journey. Logically, these upgrades deliver tangible, quantifiable benefits: much simpler maintenance, lower energy usage via efficient systems, greatly improved everyday functionality, and significantly increased resale value when you decide to upgrade or sell.
OCRV Center functions as a dependable partner for these valuable transformations. With extensive knowledge in comprehensive motorhome services, certified technicians manage custom cabinetry, RV kitchen remodel southern California, RV flooring upgrades, electrical integrations, plumbing work, and more under one roof for optimal efficiency and uniform quality. Located at 23281 La Palma Ave. Yorba Linda CA 92887, (714) 909-1444, near the 5 and 91 freeways, OCRV Center serves Southern California with precision, reliability, and genuine care. Whether you have a large Class A diesel pusher, compact Class B camper van, versatile Class C motorhome, or any other RV configuration, the team steadily provides repeatable, high-value results—better comfort, superior durability, and enduring satisfaction that justify the investment.
OCRV Center's satisfaction guarantee confirms every project meets or exceeds expectations throughout the entire process. No-cost consultations offer clear, tailored recommendations without any pressure. Hundreds of satisfied owners in Southern California have realized the difference expert, integrated service makes in their motorhome experience. Don't keep accepting another season of limitations and irritation. Contact (714) 909-1444 or visit ocrvcenter.com today for your complimentary consultation on RV interior remodeling southern California. Your motorhome—and every adventure ahead—deserves this level of care and quality.
Frequently Asked Questions About RV Interior Remodeling Southern California
How much does RV interior remodeling southern California cost?
RV interior remodeling southern California typically ranges from $5,000 to $25,000 depending on project scope and customization level. Smaller targeted updates like custom cabinetry refacing or partial RV flooring upgrades often fall in the $5,000–$10,000 range while comprehensive transformations involving full RV kitchen remodel southern California, bathroom renovations, complete storage redesigns, and lighting upgrades generally range from $15,000 to $25,000 or higher. Transparent, itemized quotes allow accurate planning without surprises. Bundling multiple upgrades frequently reduces overall costs through shared labor and materials. Professional execution adds lasting value and increased resale appeal. See more on RV remodel services. (132 words)
What is involved in RV interior remodeling southern California?
The process starts with a thorough consultation to document goals, lifestyle needs, and budget parameters. Detailed design plans follow, including precise measurements, layout optimization, and material recommendations. Tear-down safely removes outdated components, followed by structural and subfloor repairs as needed. Installation features precise custom cabinetry fitting, RV flooring upgrades, upholstery coordination, and integrated electrical/plumbing work. Final quality assurance rigorously tests every element for functionality and durability. This structured approach protects the vehicle and delivers cohesive results. Experienced teams minimize disruption while maximizing satisfaction. Learn about related RV maintenance. (118 words)
How long does RV interior remodeling southern California take?
Project timelines vary significantly based on scope and complexity. Focused updates like custom cabinetry refacing or RV flooring upgrades may require a few weeks while comprehensive remodels involving RV kitchen remodel southern California, bathroom transformations, and full interior work typically span several weeks to a few months. Efficient one-roof coordination keeps projects moving steadily compared to multi-vendor approaches. Regular progress updates maintain transparency throughout. Dedicated teams ensure most projects stay on schedule. Explore related RV service timelines. (102 words)
Is custom cabinetry worth it for RV interior remodeling southern California?
**Custom cabinetry** provides outstanding value in RV interior remodeling southern California by dramatically improving organization, maximizing limited space, and enhancing daily convenience throughout the motorhome. Features such as pull-out drawers, soft-close mechanisms, corner carousels, and vertical storage eliminate clutter and make items easily accessible even during travel. Quality construction with RV-appropriate materials ensures longevity despite constant movement and temperature fluctuations. The upgrade significantly increases comfort and substantially boosts resale value when selling the motorhome. Most owners recover their investment quickly through improved usability and pride in a personalized interior. See examples in project photos. (124 words)
What are the best materials for RV flooring in southern California?
Luxury vinyl plank and high-grade laminate stand out as top choices for RV flooring upgrades in southern California due to their exceptional resistance to moisture, scratches, spills, and fading from intense sunlight. These lightweight materials meet RV weight restrictions while offering easy cleaning and long-term durability under heavy foot traffic. Professional installation creates seamless transitions and prevents common issues like buckling or seam separation. These flooring options provide excellent value through low maintenance requirements and modern appearance that complements other interior upgrades. Check related RV remodel flooring options. (108 words)
Can RV interior remodeling southern California include off-grid upgrades?
Yes, RV interior remodeling southern California frequently incorporates off-grid enhancements including solar panel wiring integration, larger battery bank installations, efficient inverter systems, and low-power LED lighting throughout the interior. These features enable extended boondocking without sacrificing modern comforts or conveniences. Designs ensure power upgrades blend seamlessly with custom cabinetry, RV flooring upgrades, and overall layout changes. Owners achieve greater independence while maintaining a stylish, functional living space. This combination appeals strongly to adventure-oriented RVers who value both aesthetics and self-sufficiency. Explore related RV maintenance for off-grid systems. (114 words)
How do I choose the right RV interior remodeling southern California company?
Select providers based on transparent pricing structures, comprehensive one-roof capabilities, satisfaction guarantees, and verifiable positive customer feedback. Prioritize experience with motorhome-specific construction, regional climate knowledge, and consistent communication practices. Verify certifications, warranties, and references to confirm reliability and quality standards. Companies offering bundled services and detailed project timelines typically deliver superior outcomes. A no-pressure consultation reveals whether the team aligns with your specific needs, preferences, and budget constraints. Review customer feedback on testimonials page. (98 words)
What upgrades improve RV kitchen remodel southern California?
**RV kitchen remodel southern California** benefits significantly from compact induction cooktops, low-profile refrigerators, convection microwaves, moisture-resistant countertops, and optimized storage solutions that maximize limited space. These improvements make meal preparation easier, more efficient, and more enjoyable during travel. Enhanced ventilation systems and durable, easy-clean finishes resist heat, humidity, and odors common in the region. Upgraded sinks, faucets, and cabinet configurations add practical functionality while maintaining a clean, contemporary appearance. The result is a more attractive, user-friendly kitchen that supports frequent cooking on the road. See related RV remodel kitchen examples. (112 words)
Does RV interior remodeling southern California increase resale value?
Yes, modern custom cabinetry, updated RV flooring upgrades, efficient RV kitchen remodel southern California, contemporary lighting, and overall refreshed interiors significantly increase resale value. Buyers actively seek move-in-ready motorhomes with functional, attractive, and well-maintained living spaces. Quality professional upgrades signal careful ownership and appeal to a broader market segment. Many owners recover a substantial portion of their investment—and often more—when selling or trading their motorhome. The combination of enhanced comfort, improved aesthetics, and demonstrated durability creates strong buyer demand (Foothill Ranch Rv Dinette Booth). Explore resale-related RV service benefits. (104 words)
Are there guarantees for RV interior remodeling southern California work?
Reputable providers offer satisfaction guarantees covering both workmanship and materials used in RV interior remodeling southern California. These protections ensure prompt resolution of any issues that may arise after project completion. Warranties demonstrate confidence in installation quality and component durability. Clear terms outlined during the initial consultation establish expectations and build trust from the beginning. Owners gain substantial peace of mind knowing their investment receives ongoing protection. Review warranty details on contact page. (92 words)
OCRV Center
Address: 23281 La Palma Ave Yorba Linda, CA 92887Phone: (714) 909-1444
Email: art@ocrvcenter.com
OCRV Center
Rv Refrigerator Replacement Foothill Ranch, CA
Rv Sofa Beds Foothill Ranch, CA
Awning Installation Foothill Ranch, CA
Rv Dining Table Foothill Ranch, CA
Rv Couch Bed Foothill Ranch, CA
Awnings For Rv Foothill Ranch, CA
Rv Dinette Booth Foothill Ranch, CA
Replacement Windows For Campers Foothill Ranch, CA
Rv Replacement Awnings Foothill Ranch, CA
Rv Sofas Foothill Ranch, CA
Rv Dining Table Foothill Ranch, CA
Rv Dinette Table Foothill Ranch, CA
Rv Refrigerator Replacement Foothill Ranch, CA
Rv Sofa Sleeper Foothill Ranch, CA
Awning Installation Foothill Ranch, CA
Rv Restoration Companies Foothill Ranch, CA
Replace Rv Flooring Foothill Ranch, CA
Rv Couch Bed Foothill Ranch, CA
Rv Replacement Furniture Foothill Ranch, CA
Replacement Windows For Rv Foothill Ranch, CA
Replacement Windows For Rv Foothill Ranch, CA
Rv Upholstery Foothill Ranch, CA
Motorhome Carpets Foothill Ranch, CA
Rv Floor Replacement Foothill Ranch, CA
Rv Refrigerator Replacement Foothill Ranch, CA
Rv Floor Replacement Foothill Ranch, CA
Motorhome Carpets Foothill Ranch, CA
Rv Microwave Replacement Foothill Ranch, CA
Rv Restoration Companies Foothill Ranch, CA
Replace Rv Flooring Foothill Ranch, CA
Rv Chairs Foothill Ranch, CA
Rv Carpet Installation Foothill Ranch, CA
Rv Couch Bed Foothill Ranch, CA
Awning Installation Foothill Ranch, CA
Rv Dinette Table Foothill Ranch, CA
Rv Sofa Sleeper Foothill Ranch, CA
Rv Interior Remodel Foothill Ranch, CA
Motorhome Carpets Foothill Ranch, CA
Rv Sofa Sleeper Foothill Ranch, CA
Rv Couch Foothill Ranch, CA
Rv Carpet Replacement Foothill Ranch, CA
Rv Couch Bed Foothill Ranch, CA
Rv Restoration Companies Foothill Ranch, CA
Rv Interior Furniture Foothill Ranch, CA
Rv Interior Remodel Foothill Ranch, CA
Motorhome Carpets Foothill Ranch, CA
Rv Microwave Replacement Foothill Ranch, CA
Rv Microwave Replacement Foothill Ranch, CA
Rv Chairs Foothill Ranch, CA
Rv Replacement Awnings Foothill Ranch, CA
Rv Carpet Installation Foothill Ranch, CA
Rv Interior Remodel Foothill Ranch, CA
Motorhome Carpets Foothill Ranch, CA
Rv Floor Replacement Foothill Ranch, CA
Rv Replacement Awnings Foothill Ranch, CA
Rv Microwave Replacement Foothill Ranch, CA
Rv Chairs Foothill Ranch, CA
Rv Sofa Sleeper Foothill Ranch, CA
Awning Installation Foothill Ranch, CA
Rv Dinette Booth Foothill Ranch, CA
Rv Interior Furniture Foothill Ranch, CA
Rv Replacement Furniture Foothill Ranch, CA
Replacement Windows For Campers Foothill Ranch, CA
Rv Interior Remodel Foothill Ranch, CA
Awning Installation Foothill Ranch, CA
Rv Dining Table Foothill Ranch, CA
Rv Sofas Foothill Ranch, CA
Motorhome Carpets Foothill Ranch, CA
Rv Dinette Table Foothill Ranch, CA
Rv Sofas Foothill Ranch, CA
Rv Dinette Booth Foothill Ranch, CA
Rv Replacement Awnings Foothill Ranch, CA
Awnings For Rv Foothill Ranch, CA
Rv Couch Foothill Ranch, CA
Rv Replacement Awnings Foothill Ranch, CA
Awnings For Rv Foothill Ranch, CA
Rv Carpet Installation Foothill Ranch, CA
Replacement Windows For Campers Foothill Ranch, CA
Near Here Seo Marketing Foothill Ranch, CA
Near You Seo For Small Business Foothill Ranch, CA
OCRV Center
Rv Microwave Replacement Foothill Ranch, CA
Rv Carpet Replacement Foothill Ranch, CA
Table of Contents
- – OCRV Center
- – What Makes the Best RV Repair Services for Mot...
- – Comprehensive One-Stop Solutions for Motorhom...
- – Expertise in Motorhome-Specific Challenges
- – Transparent Processes and Communication
- – How Much Does RV Interior Remodeling Southern ...
- – Factors Influencing Remodeling Costs
- – Value Breakdown by Upgrade Type
- – Avoiding Hidden Fees in Quotes
- – What Is Involved in Professional RV Interior R...
- – Initial Consultation and Design Phase
- – Tear-Down and Preparation
- – Installation and Customization
- – Final Testing and Quality Assurance
- – Why Choose Experts for RV Interior Remodeling ...
- – Professional Quality and Safety Standards
- – Time and Cost Efficiency
- – Comparison to Common Alternatives
- – Popular Upgrades in RV Interior Remodeling Sou...
- – Custom Cabinetry and Storage Solutions
- – Kitchen and Bathroom Transformations
- – Flooring and Lighting Enhancements
- – Off-Grid and Luxury Add-Ons
- – Real Results from RV Interior Remodeling South...
- – Before-and-After Examples Overview
- – Customer Experiences
- – Increased Satisfaction and Value
- – Serving Motorhome Owners Across Southern Calif...
- – Regional Accessibility
- – Tailored to Local Conditions
- – Common Concerns About RV Interior Remodeling S...
- – Budget Overruns and Unclear Pricing
- – Quality and Durability Worries
- – Timeline and Downtime Fears
- – We Can Help! Contact Us Today
- – Frequently Asked Questions About RV Interior R...
- – OCRV Center
Latest Posts
Mobility Van Repair Near Me Norco
Mercedes Sprinter Van Repair Near Me Orange County
Painting Fiberglass Motorhome Montclair
More
Latest Posts
Mobility Van Repair Near Me Norco
Mercedes Sprinter Van Repair Near Me Orange County
Painting Fiberglass Motorhome Montclair