All Categories
Featured
Table of Contents
- – Lawn Sprinkler Repair Walnut, CA
- – Pacific Green Landscape Maintenance
- – Sprinkler System Installation Walnut, CA
- – Installing A Sprinkler System Walnut, CA
- – Residential Irrigation Repair Walnut, CA
- – Install Sprinkler System Walnut, CA
- – Installing A Sprinkler System Walnut, CA
- – Sprinkler System Installation Walnut, CA
- – Lawn Irrigation System Walnut, CA
- – Irrigation System Repair Service Walnut, CA
- – Lawn Irrigation Services Walnut, CA
- – Residential Irrigation Repair Walnut, CA
- – Lawn Sprinkler Repair Walnut, CA
- – Lawn Irrigation Companies Walnut, CA
- – Pacific Green Landscape Maintenance
Lawn Sprinkler Repair Walnut, CA
Pacific Green Landscape Maintenance
6530 Whittier Ave Whittier, CA 90601-3919(562) 203-3567
Pacific Green Landscape Maintenance
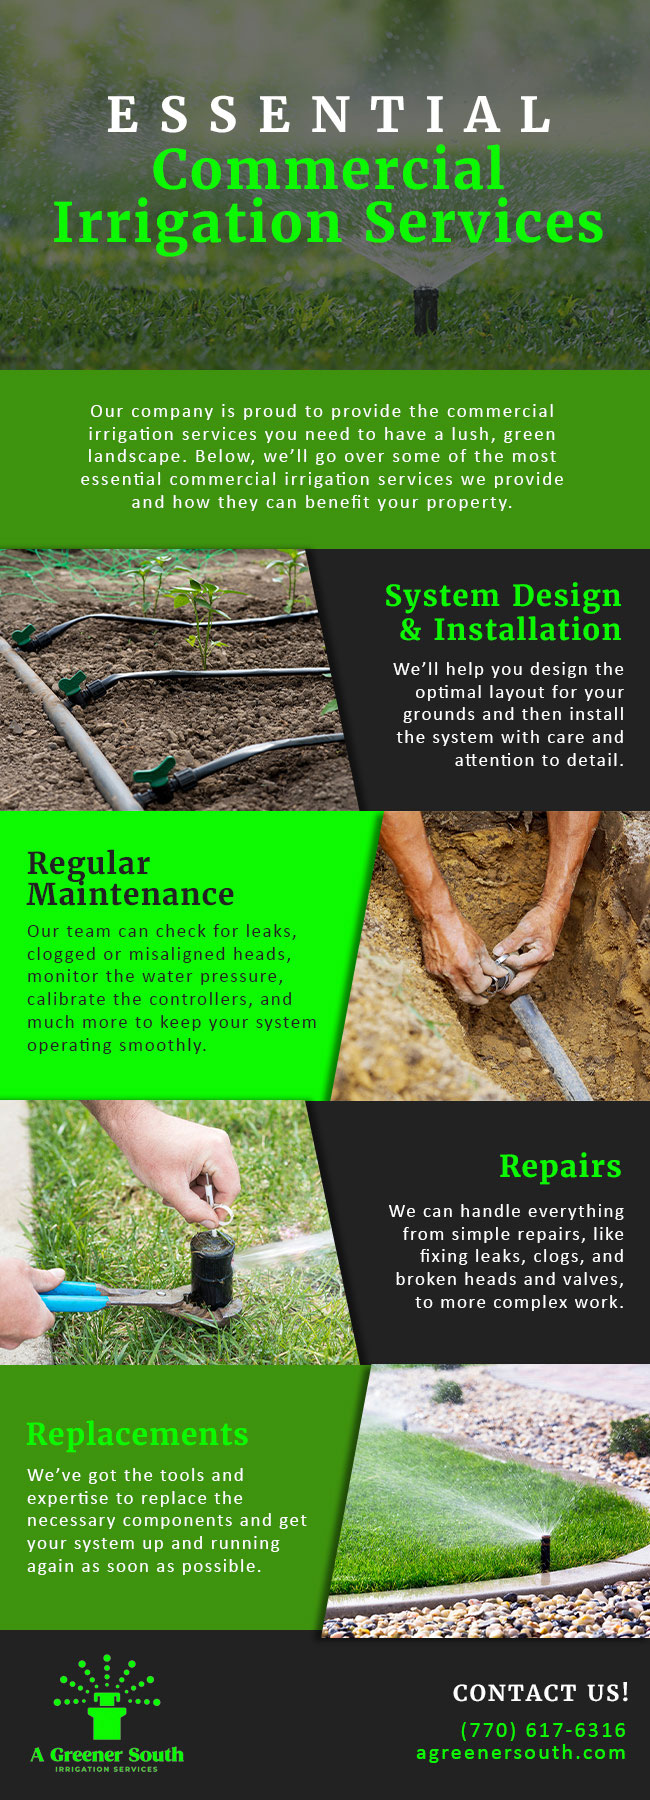
A yard and landscape that is dull or struggling might not be obtaining the water it requires (Walnut Lawn Sprinkler Companies). That's why when it comes to having a home that you can be happy with, you require irrigation installment and maintenance solutions you can rely on
It's called a "wise watering system" for a reason. Your landscape design changes with time. Plants obtain larger. Areas that utilized to be in the sun may be partially shaded now. You may have mature plants now that weren't even there when your industrial building watering system was set up. Your watering system requires to evolve along with your landscaping to supply appropriate coverage.
If not, replacing components of your system sprinkler heads, timers, and valves as required along the way can spread out the cost over time. You want your residential or commercial property to look fantastic, really feel welcoming, and draw in brand-new occupants, purchasers, or clients.
Sprinkler System Installation Walnut, CA
Maybe that means professional irrigation system fixing. Or it may be time to start over with a new one. We'll gather the details, develop a customized plan just for you, and you can quit emphasizing as we boost and enhance your business residential or commercial property.
We will certainly reveal up on time and will be 100% expert in appearance, activities, and words. Our watering service technicians are highly trained and can fix the challenging irrigation difficulties.
Installing A Sprinkler System Walnut, CA
With our system updates, upgrades, repair services and changes we can commonly decrease our clients' irrigation water usage by 40-60%. With several of the most costly water in the country, all Marietta citizens can take advantage of a reduced water expense! We utilize the finest components readily available. With a concentrate on conservation our wise irrigation components will make use of less water and offer you a much healthier yard and landscape than ever.
Routine upkeep of your watering system conserves time and stops wasting water. An effectively preserved lawn sprinkler will equally disperse water, getting rid of completely dry places and the danger of over watering. Brookhaven Watering also deals with concerns such as damaged or blocked lawn sprinkler heads, making certain that every lawn sprinkler head is working appropriately.
Residential Irrigation Repair Walnut, CA
Fortunately, Gainesville Lawnscaping supplies watering setup and irrigation repair service solutions in the higher Main Florida location! Whether you simply require watering system repair work or a complete system set up, Gainesville Lawnscaping can get your task finished promptly and in spending plan. We'll guarantee that your system is working appropriately and that your timer box is set to abide with neighborhood watering restrictions.
You will not need to bother with costly blunders in electrical wiring or pipe setup. We can do the job rapidly, with much less disturbance to existing landscape, and will ensure our job. Industrial Installment & Service High-end Residential Installment & Service Grass Sprinkler System Wetness Sensor Installment Drip and Low Emittance Equipments Underground Watering Systems Rain Sensors Grandview expertly sets up sprinkler system systems with marginal disruption to your existing yard and landscaped locations.
Install Sprinkler System Walnut, CA
Oftentimes entrepreneur and residential property managers assume the service to a problem landscape is simply to add even more water. While in some instances and for a really brief length of time this may resolve an issue or two briefly, this is merely not the appropriate solution. Your business landscape can quickly be over-watered when not effectively maintained.
Even with water limitations, businesses with a correct irrigation system ought to have no trouble at all keeping a lush landscape and even conserve money at the same time. Believe it or otherwise, way too much water is virtually as poor as not sufficient water. Over-watering will certainly provide the appearance of a sickly, yellow search most grass and plants.
Some sort of yards just need a whole lot much more water than others to look their finest. Walnut Lawn Sprinkler Companies. Yard types such as Saint Augustine need a much bigger amount or routine watering than a kind such as Bahia. No matter of your industrial residential property's grass kind, we always attempt to remain under or at your budget
Installing A Sprinkler System Walnut, CA
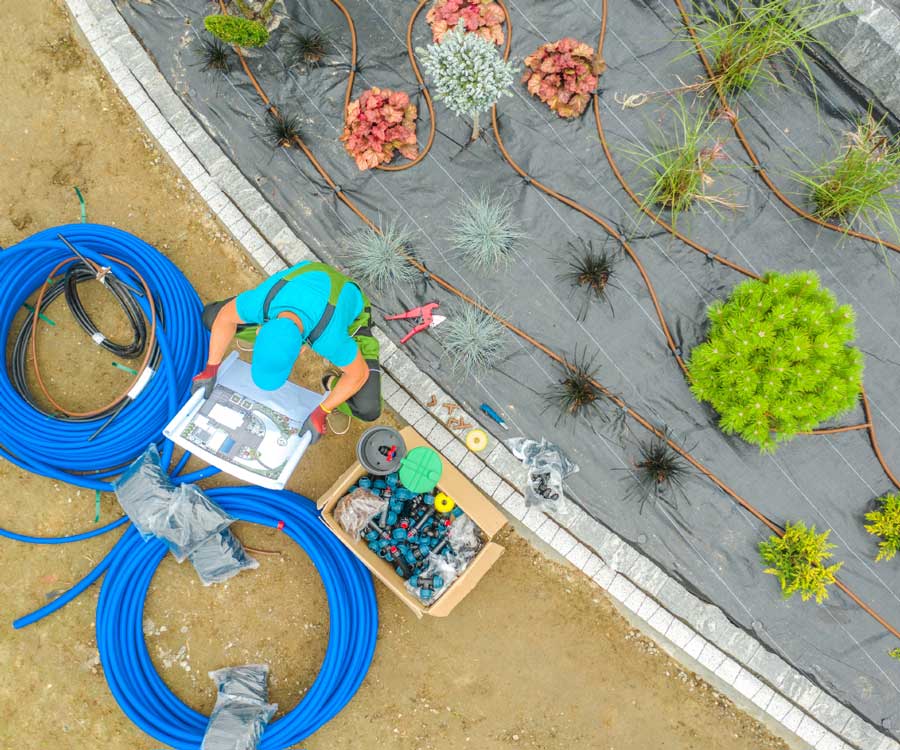
The installation procedure is usually fast and never ever really that complicated in many circumstances. After the preparation and layout stage is completed, our professional irrigation professionals will come to your commercial residential or commercial property and start setup. The majority of the moment it takes much less than a week to complete and there is extremely little, if any type of, disturbance entailed in the typical procedure of your business or property.
Back then, we can supply you a service strategy to preserve your newly installed irrigation system and keep it running at its peak efficiency. Or maybe you might simply have issues with your existing irrigation system. You might have damaged lawn sprinklers or it might not be running at all.
Sprinkler System Installation Walnut, CA
By analyzing every sprinkler head in every zone, looking for line breaks, leakages, and various other damages, our professionals will effectively diagnose your repair service the very first time and provide you complete photo of your watering system. At Conserva Irrigation of South Birmingham, accountable water use is a top priority. We intend to do our component for the planet and conserve you money on your water bill while doing so.
If you want the grass and plants on your industrial building or HOA to thrive, they will certainly need to stay appropriately hydrated throughout the year. That's where we come in! At B&C Landscape design, we provide a big choice of industrial watering services to guarantee your plant life receives the water it requires and your alcohol consumption supply is risk-free.
Our heartburn screening solution is one of one of the most crucial maintenance services you have to obtain done annually. That's because this solution is developed to check if your irrigation system's heartburn prevention device is working appropriately (Walnut Lawn Sprinkler Companies). Your watering system's backflow prevention device is responsible for guaranteeing water just streams in one direction
Lawn Irrigation System Walnut, CA
Your yard is one of the initial things that people observe when they pull up to your home for the first time. The last point you desire is for them to see a brownish, dying grass! If your irrigation system isn't operating correctly, it can lead to added issues in your landscape, consisting of flooding and underwatering.
When this takes place, the blocked lawn sprinkler head is not able to spray water. In extra serious instances, there might also be a clog within the watering system's pipelines that needs to be removed. Lawn sprinkler head repair work is a reasonably very easy repair and you'll be up and running again in no time at all.
An efficient landscape irrigation system will certainly provide the right quantity of water to the origin zone of all your plants. A computerized irrigation system can conserve you the headache and time of watering by hand.
Setting up a watering system protects your investment in your residential property. When installing plants, it is very important that a plan is produced watering, otherwise plants might not get the best quantity of water they require to grow and you will need to invest more cash to replace them. An automated watering system will certainly deal with all your watering requires.
Irrigation System Repair Service Walnut, CA
Or if it rainfalls, the system can readjust the amount of water the plants obtain. Irrigation and automatic sprinkler can be set up with rain sensing units or soil wetness sensing units that can automatically change the system outcome when required. At Frontier, we set up high-efficiency irrigation systems, designed to be one of the most affordable on the market and tailored to your private demands and home.
Frontier Landscape design will certainly repair and keep these systems along with perform backflow screening to maintain your systems running efficiently all year long. Regular Watering Ensure that your plants receive the correct amount of water at the best time! Water Conservation Irrigation systems conserve water! An automatic system makes certain that no extra water is squandered on overspray or hand-watering.
Secure Your Investment Don't invest big sums of money on a landscape only to have plants die from poor watering. Boost effectiveness Update your watering system and fix your sprinklers. They include to the general worth of your home.
Lawn Irrigation Services Walnut, CA
If you need to pick to place your home on the market, a well landscaped home will certainly be a lot more eye-catching, market much faster, and have more worth. We provide a Landscape & Irrigation Warranty. Frontier Landscaping supplies expert irrigation layout, installation, and fixing to household and business homes in Vancouver, Rose City, Battlefield, Kelso, Longview, Camas, Clark Area and Multnomah Area.
The effective use water is extremely important. Each home or organization has one-of-a-kind demands when it involves their landscape. It is best to speak with us to identify what will function best for your property. Living Principles designs and installs lawn sprinkler for all sorts of landscapes, in addition to keeps and repair services existing irrigation systems.
Residential Irrigation Repair Walnut, CA
We can maintain your automatic sprinkler running smoothly. There are numerous points that can create problems with residential or business watering systems. If your system is damaged, or just not measuring up to your assumptions, call us and we will certainly help you attain the results you desire. Every lawn sprinkler system is required to have its heartburn assembly tested yearly.
Sometimes, homeowner set up an irrigation system, and after that fail to keep up with the needed upkeep since they have actually obtained as well active with their company. Or, often they really feel that the cost of maintenance is also expensive. Yet without the correct maintenance, an irrigation system can become harmed, require a significant fixing, and even require to be changed.
Lawn Sprinkler Repair Walnut, CA
By routinely looking after your system, you'll make sure that it's operational for years ahead. Normal preventative upkeep assessments may additionally prevent significant damages to your system, along with save you a significant amount of money. One of the ideal ways to take treatment of your residential properties grass and plants is to take treatment of your irrigation system.
As with any investment, the most effective way to maximize your return is to nurture it and maintain it well-maintained. Administration of watering for turf locations calls for understanding about a selection of subjects a few of that include operation of irrigation equipment, water and dirt partnerships, water demands for different kinds of grass, soils, and on different tasks kinds, seasonal results on grass and behavior of different sorts of lawn sprays with regard to grades and various other elements in the landscape.
Lawn Irrigation Companies Walnut, CA
The usage of weather and sensing unit based systems are exceptionally affective for saving water and guaranteeing that grass gets the correct quantity without over-watering. Observe all landscape locations for possible watering concerns.
Pacific Green Landscape Maintenance
Address: 6530 Whittier Ave Whittier, CA 90601-3919Phone: (562) 203-3567
Email: pacificgreencompany@gmail.com
Pacific Green Landscape Maintenance
Use original landscape plan and as-built attracting to help evaluate the options and best corrective steps. Videotape changes for future reference. Adjust watering routine on an as required basis (winter season yard needs less water than summertime turf, wet seasons and so on). Utilize a soil probe to figure out actual soil screen soil wetness and display dirt dampness on a regular and scheduled basis.
Sprinkler Systems Near Me Walnut, CASprinkler System Repairs Walnut, CA
Irrigation Service Walnut, CA
Sprinkler System Installation Walnut, CA
Installing A Sprinkler System Walnut, CA
Installing A Sprinkler System Walnut, CA
Landscape Irrigation Repair Walnut, CA
Sprinkler System Installer Walnut, CA
Lawn Irrigation Services Walnut, CA
Sprinkler Installers Walnut, CA
Lawn Irrigation System Walnut, CA
Sprinkler System Repairs Walnut, CA
Irrigation System Repair Service Walnut, CA
Sprinkler System Repairs Walnut, CA
Lawn Sprinkler Installers Walnut, CA
Irrigation Systems Installers Walnut, CA
Sprinkler Installers Walnut, CA
Sprinkler Installers Walnut, CA
Sprinkler Systems Installers Walnut, CA
Sprinkler System Installation Walnut, CA
Irrigation System Installers Walnut, CA
Install Sprinkler System Walnut, CA
Commercial Irrigation Services Walnut, CA
Installing A Sprinkler System Walnut, CA
Irrigation System Installers Walnut, CA
Lawn Sprinkler Installers Walnut, CA
Commercial Irrigation Services Walnut, CA
Irrigation Repair Services Walnut, CA
Lawn Sprinkler Service Walnut, CA
Sprinkler System Repairs Walnut, CA
Sprinkler Installer Walnut, CA
Install Sprinkler System Walnut, CA
Commercial Irrigation Services Walnut, CA
Lawn Irrigation System Walnut, CA
Residential Irrigation Repair Walnut, CA
Lawn Irrigation Services Walnut, CA
Lawn Irrigation Companies Walnut, CA
Install Sprinkler System Walnut, CA
Irrigation Service Walnut, CA
Irrigation System Installers Walnut, CA
Irrigation System Maintenance Walnut, CA
Irrigation Installer Walnut, CA
Lawn Irrigation Companies Walnut, CA
Sprinkler Installation Companies Walnut, CA
Lawn Sprinkler Installers Walnut, CA
Sprinkler Systems Near Me Walnut, CA
Irrigation Installers Walnut, CA
Lawn Irrigation Services Walnut, CA
Lawn Sprinkler Companies Walnut, CA
Lawn Sprinkler Repair Walnut, CA
Sprinkler System Installation Walnut, CA
Sprinkler System Repairs Walnut, CA
Lawn Sprinkler Repair Walnut, CA
Sprinkler Installer Walnut, CA
Commercial Irrigation Repair Walnut, CA
Sprinkler System Installer Walnut, CA
Lawn Irrigation System Walnut, CA
Lawn Sprinkler Installers Walnut, CA
Sprinkler Installation Companies Walnut, CA
Commercial Irrigation Services Walnut, CA
Irrigation System Maintenance Walnut, CA
Irrigation System Maintenance Walnut, CA
Irrigation System Repair Service Walnut, CA
Around Here Seo Services For Business Walnut, CA
Find A Seo Citations Walnut, CA
Pacific Green Landscape Maintenance
Table of Contents
- – Lawn Sprinkler Repair Walnut, CA
- – Pacific Green Landscape Maintenance
- – Sprinkler System Installation Walnut, CA
- – Installing A Sprinkler System Walnut, CA
- – Residential Irrigation Repair Walnut, CA
- – Install Sprinkler System Walnut, CA
- – Installing A Sprinkler System Walnut, CA
- – Sprinkler System Installation Walnut, CA
- – Lawn Irrigation System Walnut, CA
- – Irrigation System Repair Service Walnut, CA
- – Lawn Irrigation Services Walnut, CA
- – Residential Irrigation Repair Walnut, CA
- – Lawn Sprinkler Repair Walnut, CA
- – Lawn Irrigation Companies Walnut, CA
- – Pacific Green Landscape Maintenance
Latest Posts
Travel Trailer Repairs East Irvine
Walnut Onan Generator Repair
Commercial Kitchen Hood Cleaning Verdugo City
More
Latest Posts
Travel Trailer Repairs East Irvine
Walnut Onan Generator Repair
Commercial Kitchen Hood Cleaning Verdugo City